
Sommaire
Outdoor lighting with sensor: where to place fixtures and how to adjust them effectively
To install outdoor lighting with a sensor, place the fixture on the actual path used, aim the sensor towards the movement, and gradually adjust the range, sensitivity, and delay. Proper adjustment lights up a lock, steps, or pathway without triggering the lamp at every passing car, branch movement, or animal presence.
The height, angle, power supply, and protection rating depend on the site configuration. This guide explains how to choose the location, prepare the installation, adjust an outdoor motion sensor, test coverage, and correct false triggers safely.
In brief
- 📍 Aim the sensor towards the arrival path, not directly at the door or street.
- 📏 A starting height of about 2 to 2.5 meters may be suitable, subject to the manual and configuration.
- ⚙️ Adjust one parameter at a time: orientation, range, sensitivity, then delay.
- ⚡ Turn off the circuit at the breaker before any intervention on a mains-connected model.
Choosing the fixture location according to the area to be lit
Outdoor lighting with a sensor is a fixture equipped with a sensor that triggers the light when movement or presence is detected. The right location is first determined by observing the movements to be secured, then by choosing the support capable of lighting the handling areas.
The beam should follow the movement towards the useful area, rather than creating a dazzling light facing the person. Identify steps, handles, locks, corners, and changes of direction before choosing the available wall or post. A nearby outlet alone does not constitute a good positioning criterion.
House entrance and threshold
For an outdoor entrance fixture, cover the lock, handle, threshold, and first steps. A wall sconce placed above or beside the door may be suitable if the beam does not cast a shadow on the arriving person.
Aim the sensor towards the arrival axis rather than the facade. A sensor aimed directly at the door may react late, when the person is already in front of the threshold. Also check that the light does not shine directly into a living room or neighboring window.
Gate, driveway, and vehicle access
For gate or driveway lighting, place the device so as to cover the passage without aiming directly at the public road. A bollard, spotlight, or wall sconce can be adapted depending on the width of the area and the presence of a wall or post.
- Aim detection towards the arrival path, preferably transversely to the movement.
- Keep the sensor away from branches, hedges, parked vehicles, and other moving elements.
- Limit the beam directed towards windows, the street, and neighboring homes.
Terrace, garage, stairs, and side passage
A terrace, garage, or side passage often includes several small areas to light: steps, corners, handle, lock, or parcel handling space. A single fixture may miss part of the path when an outdoor corridor is long, narrow, or has a turn.
In this case, plan for additional coverage rather than excessively increasing the range of a single sensor. Light directed towards living rooms can become annoying, especially when the device triggers multiple times during the night.
Determining the height and orientation of the outdoor detector
At what height should an outdoor motion detector be placed? A starting height of about 2 to 2.5 meters can serve as a reference for a facade, but the final position depends on the detection angle, the specified range, and the path to be covered. The model’s manual remains the priority.
An installation that is high enough limits shocks and accidental handling. However, a position that is too high may reduce the sensor’s ability to detect movement close to the ground or inside a staircase. Check the actual coverage before permanently fixing the mount.
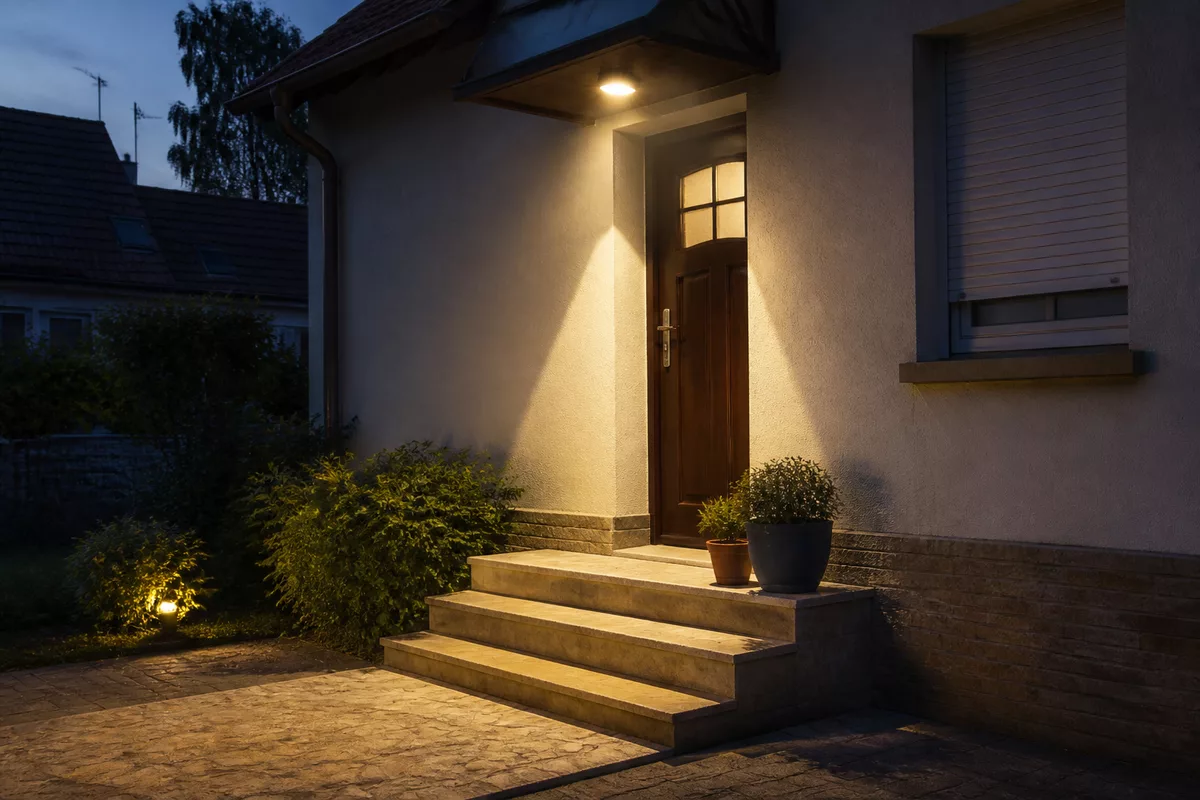
Adjusting the height to the path
A threshold or staircase often requires a slightly downward orientation to cover the first few meters. A wide area may justify a higher position only if the specified range and angle remain compatible with the actual distance.
The presence of pets, plants, and movements at the property boundary must also be considered in the adjustment. An installation aimed at a moving hedge can cause repeated activations, even if the height seems correct.
Avoiding areas that disrupt detection
Passive infrared sensors, often called PIR sensors, react to infrared variations associated with moving heat sources. Performance varies depending on the model and environment, especially when the sensor is placed near a vent, an air conditioner, or a highly reflective surface.
- Do not point the detector towards a busy street or a window.
- Keep it away from branches that move with the wind.
- Avoid heat sources and hot air flows.
- Use only the zone covers provided by the manufacturer.
Preparing and safely installing outdoor lighting with a detector
How to install automatic outdoor lighting without taking risks? Start by checking the compatibility between the fixture, the detector, the power supply, and the mounting accessories. For a model connected to the mains, turn off the circuit breaker and verify the absence of voltage before any intervention.
Connecting an outdoor fixture may involve cables exposed to moisture, junction boxes, and grounding depending on the equipment. In case of doubt, damaged cable, complex installation, or circuit modification, entrust the connection to a qualified electrician.
Precise adjustment does not compensate for electrical installation performed under power or a box poorly protected against moisture.
Checking the equipment before installation
The manual should specify the recommended height, angle, range, lighting duration, and available settings. Also check the condition of the box, seals, cover, and cable entries before fixing the product.
Outdoor lighting with detectors is available in solar versions, battery-powered, or mains-connected. Solar power simplifies wiring, but its operation depends on exposure and available charge. Mains power is more suitable for a regularly used area, while batteries can meet occasional needs when wiring is difficult.
Checking waterproofing and stability after installation
The IP rating indicates a level of protection against the penetration of solid objects and water. Consult the technical sheet and the model’s manual to verify that it is suitable for its exposure.
The IP rating does not summarize the entire resistance of the fixture to weather: check the manufacturer’s sheet and the exact exposure of the location. After installation, check the stability of the support, the positioning of the seals, the tightening of the cover, and the absence of movement caused by wind.
A box suitable for outdoor use must remain stable, properly closed, and compatible with the actual exposure of the wall, post, or bollard.
Gradually adjust the range, sensitivity, delay, and brightness
How to adjust an outdoor motion detector? Start with medium settings, then change one parameter at a time. Test the system at dusk and at night, as natural light changes the perception of the area and the operation of the twilight threshold.
A motion detector is neither a full twilight sensor nor a surveillance camera. Some luminaires combine the first two functions: motion triggers the lighting only when the ambient brightness falls below an adjustable threshold.
| Setting | Starting action | Useful correction | Point of caution |
|---|---|---|---|
| Range | Medium setting | Increase until covering the path | Avoid the street, windows, and interfering areas |
| Angle | Point towards the passage | Tilt or slightly move the sensor | Check blind spots near the threshold |
| Sensitivity | Intermediate level | Reduce if repeated triggers occur | Animals and plants can disrupt detection |
| Delay | Short to medium duration | Extend for a staircase or handling | Excessive duration keeps the light on unnecessarily |
| Twilight threshold | Intermediate position | Adjust when natural light becomes insufficient | The luminaire can disrupt its own sensor |
Adjust the detection range and angle
Point the sensor towards moving people rather than their fixed arrival point. Gradually increase the range until covering the useful area, then walk from several directions to spot undetected zones.
A passage perpendicular to the detection field may be better detected than a perfectly frontal approach, depending on the sensor design. This indication should be verified with the manual and by real tests on site.
Adjust sensitivity without multiplying triggers
Reduce sensitivity if the luminaire reacts to small animals, distant movements, or plants. Increase it only when a significant part of the path remains poorly detected after correcting the orientation.
Wait for several passages between two adjustments. Changing only one setting at a time allows identifying the adjustment truly responsible for the improvement or the new disturbance.
Choose the delay and twilight threshold
An entrance or gate crossed quickly generally requires a shorter lighting duration than a staircase or an area where you need to handle a key, a package, or a door with both hands. The setting must cover the actual action, without keeping the lamp on long after the passage.
The twilight threshold determines the level of natural light from which the device agrees to operate. Adjust it when brightness decreases, then check that the lit luminaire does not disrupt its own sensor.
Test coverage and correct false detections
A complete test must reproduce daily movements from inside the property and from the main access. Perform several passes by day then by night while observing the triggering, the lit area, glare, and any disturbance to neighbors.
The most reliable correction follows a simple order: orientation, range, sensitivity, then delay. Changing all settings at once makes the result hard to understand and can worsen unnecessary triggers.
Identify causes of unwanted activations
Cars, branches, animals, reflections, and certain temperature variations can enter the detection field. A sensor pointed towards a street or window often covers an area too active for automatic outdoor lighting.
- A vehicle passes in the field: reduce the range or reorient the sensor.
- A branch moves in the wind: move it away or limit the concerned area.
- An animal triggers the lamp: decrease sensitivity if the model allows it.
- The wall or a reflective surface disrupts the system: change the installation angle.
Gradually reduce unnecessary triggers
First, redirect the detector towards the useful path. Then reduce the range or sensitivity in small steps, and repeat tests at different times of the evening.
Do not cover part of the sensor with adhesive tape or an improvised cover. An accessory not provided by the manufacturer may come off, unpredictably alter detection, or degrade the enclosure’s waterproofing.
Troubleshooting an outdoor light that turns on poorly or stays on
An outdoor light with a faulty detector must first be checked based on the settings and instructions in the manual. Examine the power supply, batteries, bulb or light module, twilight threshold, timer, and covered area before considering technical intervention.
Never handle an electrical connection under power. A reset should only be performed according to the manufacturer’s procedure, especially when the light combines a detector, twilight switch, and mains power supply.
The light does not turn on
Check that power is present, that the batteries are sufficiently charged, and that the bulb or light module works. A twilight threshold set too high can prevent triggering during the day, even if the sensor correctly detects movement.
Then adjust the orientation and range of the detector. Examine the lens and the apparent condition of the enclosure, seals, and connections without opening or touching any live electrical part.
The light stays on or triggers too often
Reduce the timer and look for continuous movement in the covered area. Branches, animals, reflections, heat sources, and excessive sensitivity are among possible causes.
Lower the sensitivity and range, then perform several tests. If the model has a test mode, reset, or specific adjustment, apply only the procedure described in its manual.
Key takeaways
- 📍 Position the light on the path to be illuminated, covering areas of handling.
- 🧭 Aim the detector towards movement and not towards a street, window, or heat source.
- ⚙️ Gradually adjust the range, sensitivity, timer, and twilight threshold.
- 🌧️ Check the IP rating, seals, and stability of the support according to outdoor exposure.
- ⚡ Cut the power before any intervention and call a professional if in doubt about electrical issues.
Sources and technical documents
- International Electrotechnical Commission (IEC) — IEC 60529, degrees of protection provided by enclosures (IP code).
- Installation manual and technical sheet from the light manufacturer: mounting height, range, detection angle, settings, IP rating, and conditions of use.
- Promotelec — safety recommendations for domestic electrical installations.
Frequently asked questions about outdoor lighting with detector
At what height should an outdoor motion detector be placed?
A starting height of about 2 to 2.5 meters may be suitable on a facade. The final height should be adapted to the detection angle, path, obstacles, and manufacturer recommendations.
What duration should be chosen for outdoor lighting with a detector?
Choose a short duration for an entrance or gate crossed quickly. A longer duration is more suitable for stairs, a driveway, or handling requiring both hands.
Why does an outdoor detector trigger at night without reason?
Animals, vehicles, branches, reflections, heat sources, and excessive sensitivity can cause triggers. First redirect the sensor, then gradually reduce the range and sensitivity.
How to orient a detector to avoid false detections?
Aim at the passage path and exclude the detection field from streets, windows, moving vegetation, and heat sources. Several real passages allow verifying if the covered area matches the need.
Which protection rating should be chosen for an outdoor luminaire?
The level depends on exposure to rain, splashes, dust, and the exact location. Check the IP rating indicated on the model’s datasheet and the manufacturer’s recommendations, as this rating does not summarize the entire resistance of the product.
Is a solar outdoor light with a sensor suitable for a driveway?
A solar model can be suitable if the panel receives enough light and if the area does not require very frequent activations. For a heavily used or poorly sun-exposed driveway, compare this solution with battery or mains power supply.
An outdoor light with a sensor works effectively when three elements remain consistent: the actually useful path, the sensor orientation, and the settings tested on site. Take the time to validate the result both day and night, without neglecting the luminaire’s waterproofing or electrical safety.