
Sommaire
Are you considering extending the growing season, protecting your young shoots, or simply adding a green touch to your outdoor space? Installing a garden greenhouse means giving plants a controlled microclimate that is conducive to the development of demanding varieties. But how do you pick the right model, prepare the ground and manage your budget without getting overwhelmed? Follow this detailed guide to succeed at every step and avoid common pitfalls.
🚀 By choosing a south-east orientation and a well-drained soil, you optimize sunlight while preventing water accumulation.
💰 Depending on size and material, budget between €150 and €2,500: polycarbonate is often a good value-for-money compromise.
🛠️ The main steps: ground preparation, assembling the structure, fastening, anchoring and finishing touches (shelves, shutters).
🌱 With a greenhouse, grow from March, reduce treatments and create an experimentation space all year round.
Choosing the right type of greenhouse
You don’t become a greenhouse architect overnight. Several materials are available, each with its strengths and limitations. Glass offers an aesthetic finish and excellent light transmission, but watch out for its weight and risk of breakage. Polycarbonate, lighter, withstands impacts and provides superior thermal insulation. Finally, tarpaulin or flexible plastic — often used on a tunnel structure — appeals because of its low price, but requires replacement every 3 to 5 years and offers lower transparency.
Glass greenhouse
With tempered or laminated glazing, the glass greenhouse evokes the orangery of yesteryear. It diffuses light evenly, without overly pronounced shadow areas. The main point of concern? The weight. Between 20 and 60 kg/m², you will need to concrete the base and provide solid anchors.
Polycarbonate greenhouse
Cellular panels of transparent polycarbonate provide excellent insulation and resist impacts (hail, branches…). The bright glass gives way here to a slightly diffused appearance, but with no risk of cuts. On the assembly side, the lightness simplifies handling, and durability often reaches 10 to 15 years.
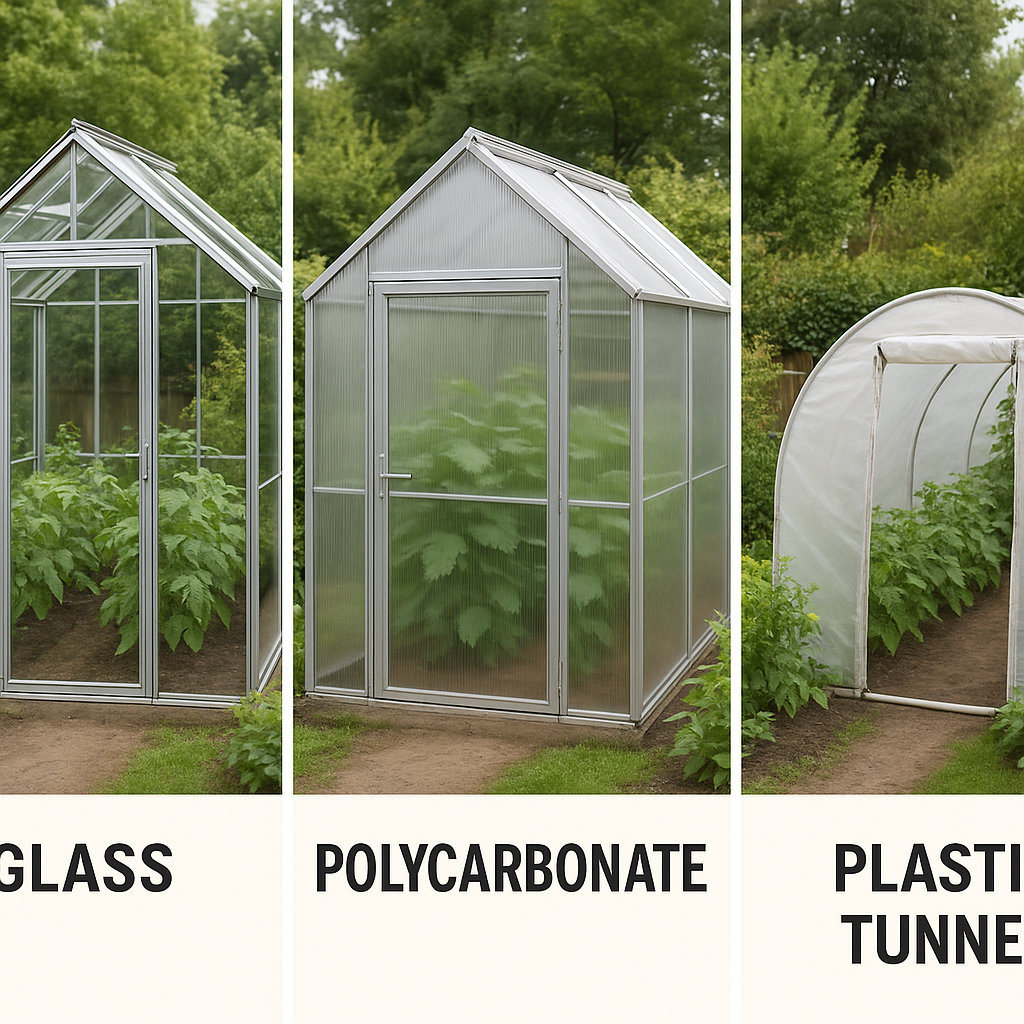
Tunnel and plastic greenhouse
Shorter lifespan, lower transparency, but rock-bottom price: from €150. Ideal for market gardeners who often change plots or for whom a 4-year lifespan is not a deterrent. Easy to move, it remains a pragmatic choice for seasonal crops.
Location and site preparation
Poorly drained soil or a shaded location, and your plants struggle to thrive. You should therefore prioritize a clear site, sheltered from large trees to limit shade and falling leaves. South-facing exposure maximizes light, while a slight southeast offset prevents overheating in the late afternoon.
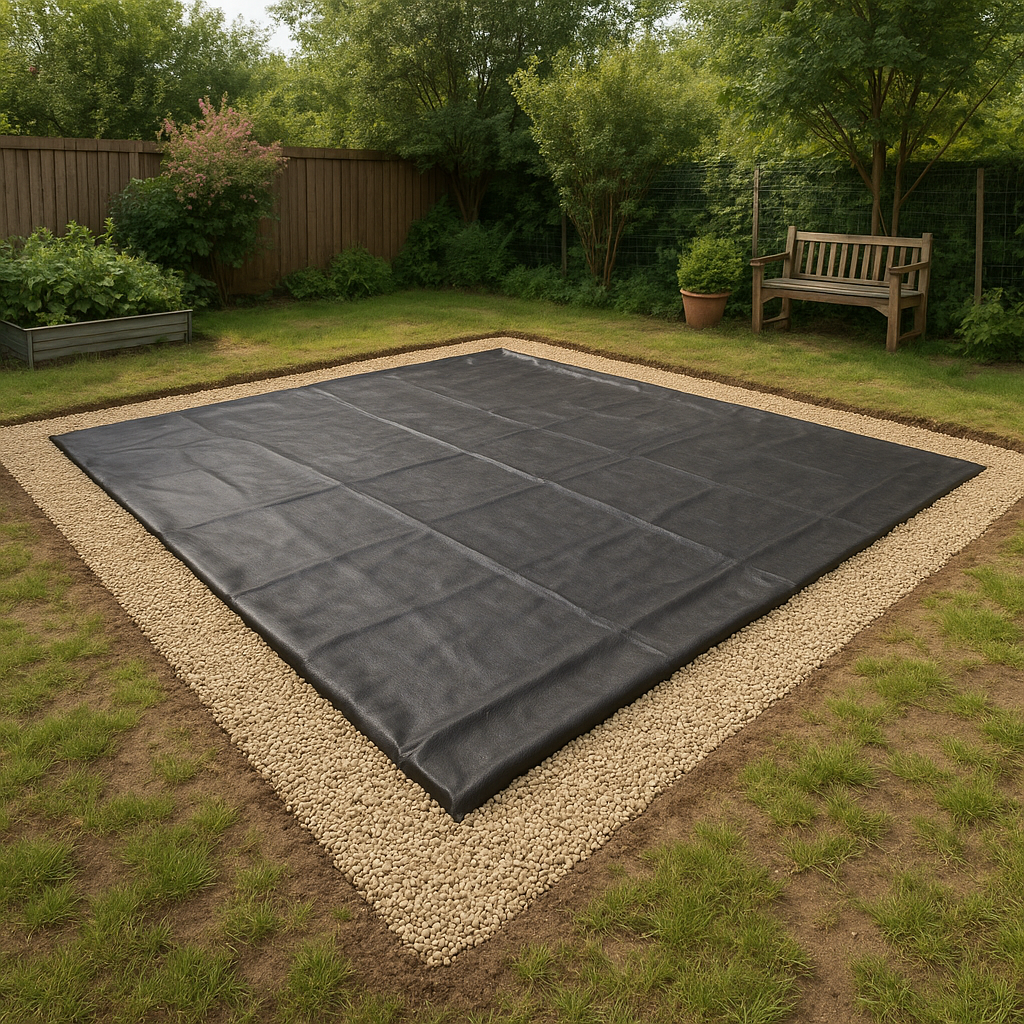
Level and drain
- Remove stones and shallow roots.
- Lay a geotextile fabric to limit weed regrowth.
- Add 10 cm of fine or crushed gravel to improve drainage.
Foundations and anchoring
For lightweight structures, metal base plates sealed in a concrete block (30×30×30 cm) are sufficient. Larger greenhouses require a full slab or a concrete-block base. In all cases, check the level with a spirit level: an uneven base compromises watertightness and proper door locking.
Materials and detailed budget
Before confirming your order, list every component: panels, frame, fastenings, door handles, gutters, automatic vents… The overall cost breaks down as follows:
| Item | Average price | Estimated lifespan |
|---|---|---|
| Aluminum frame | 100–800 € | 20 years |
| Polycarbonate panels | 50–300 € | 10–15 years |
| Tempered glass | 200–1,200 € | Unlimited if well maintained |
| Geotextile and gravel | 50–150 € | 5 years |
| Automatic solar vent | 80–300 € | 8 years |
Budget by size
A mini greenhouse of 2 m² starts at €150, while a family model of 10 m² easily climbs to €2,000. Add €200–400 if you opt for a motorized opening system or auxiliary heating.
Options and extras
- Modular shelves: €20–60 each
- Rainwater collection gutter: €30–80;
- Electric or gas heating
: €50–300 depending on power
Step-by-step installation
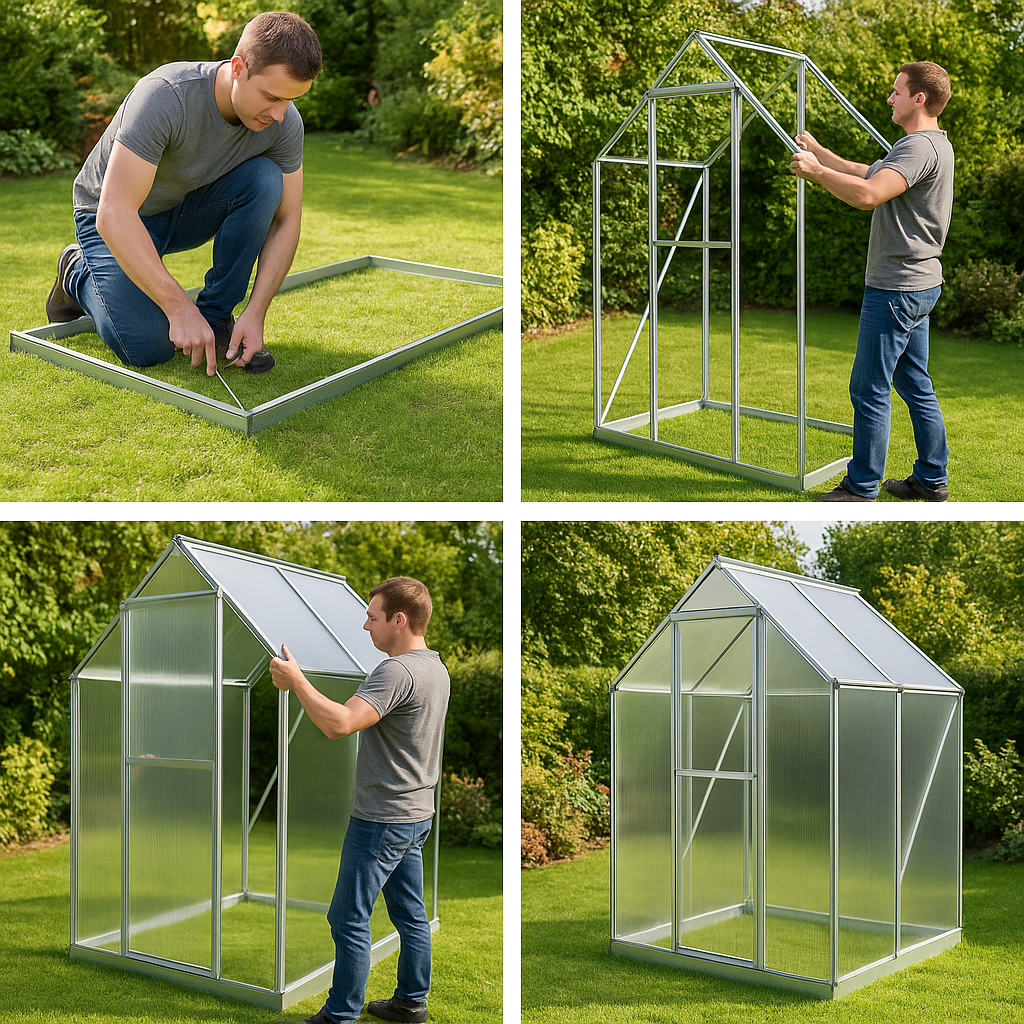
Did you receive your kit? Let’s get started! The secret is to never force a part: if a piece doesn’t fit, it’s not in the right place.
- Positioning the base plates : place them according to your plan and secure them to the ground.
- Assembling the frame : follow the instructions, work with a partner for the vertical uprights.
- Fitting the panels : slide them slowly into the rails, starting with the front.
- Sealing and waterproofing : exterior silicone, foam strips to limit infiltration.
- Finishes : install shelves, gutters and ventilation mechanisms.
Maintenance and longevity
To extend the life of your plant shelter, schedule a biannual cleaning: soapy water for the windows or panels, inspection of seals, lubrication of hinges. In cold periods, open the door slightly to limit interior condensation and prevent aluminum corrosion.
Mold treatment
Apply a mixture of water and white vinegar (1:1) to the affected surfaces, leave for 15 minutes then rinse. Even if it smells strong, it’s much less harsh than a chemical moss remover.
FAQ
What orientation for a garden greenhouse?
Ideally due south or slightly southeast. This guarantees maximum sunlight without excessive overheating late in the day.
Do you need permission to install a greenhouse?
As a general rule, a greenhouse under 1.5 m in height does not require a declaration. Beyond that, check with your local town hall as a building permit may be required.
How to ventilate my greenhouse effectively?
Combine one or more roof openings with automatic vents. Natural aeration prevents the proliferation of fungi and provides optimal air renewal.