
Sommaire
Do you dream of a garden that waters itself, without stress or waste? Drip irrigation meets this challenge by delivering water directly to the root of each plant. In this guide, we explore every step — from equipment to maintenance — so you hold the key to a reliable and economical system.
🌷 Remarkable water savings: drip irrigation limits evaporation and targets the root zone, reducing your consumption by 30 to 60 %.
💧 Complete kit ready to install: pipes, drippers, connectors, and timer assemble easily, even without professional plumbing.
🛠️ Quick setup in 4 key steps: network planning, laying pipes, installing emitters, and connecting to the faucet.
🍑 Regular maintenance essential: cleaning filters and descaling drippers ensure a consistent flow throughout the season.
Why choose drip irrigation?
Unlike a traditional watering can or a leaky hose, drip irrigation distributes water in precise doses. This means each plant receives its exact amount without soaking the soil or creating puddles. This balance promotes deep rooting and limits weed proliferation, which no longer benefit from excess surface moisture.
Water savings and efficiency
In a context where resources are becoming precious, drip irrigation is a major asset. Water no longer evaporates during a high-pressure jet, and targeted distribution can reduce overall consumption by up to 60 %. In practice, your water bill decreases, and your plants remain perfectly hydrated, even during heatwaves.
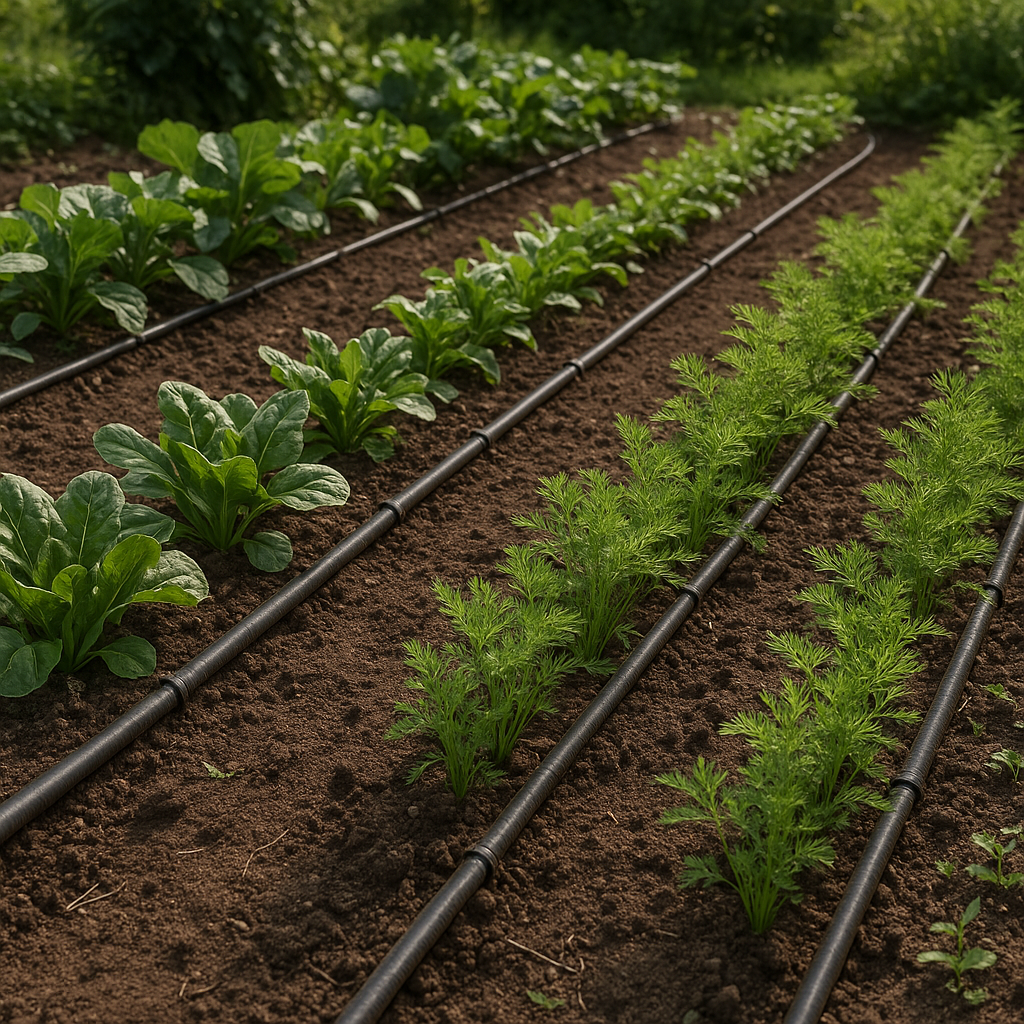
Adaptability to the garden
Vegetable garden, flower bed, or apartment terrace: the system adapts to all configurations. Short pipes suffice for a few pots on a balcony, while a more extensive network covers several dozen square meters. You can even combine different pipe diameters and integrate micro-sprinklers to water lawns and low hedges.
Equipment and preparation
Choosing your drip irrigation kit
Standard kits include a main pipe (16 mm), drippers (2 to 8 L/h depending on needs), a filter, and a timer. Some high-end sets offer a pressure regulator and quick connectors to move a plant without dismantling the entire network. Remember to check the timer’s compatibility with your faucet type: a 20 × 27 male or female thread is the most common.
Necessary tools and accessories
Before starting, gather:
- A pair of scissors or a pipe cutter
- A drill with a fine bit to drill the pipe
- A tape measure to mark your network
- A landscaping fabric (filter cloth) if the soil is sandy
| Item | Use | Indicative price |
|---|---|---|
| 16 mm pipe (15 m) | Main conduit | 5–10 € |
| 4 L/h dripper | Local distribution | €0.20/unit |
| T-connectors | Secondary connection | €1–2/piece |
| Digital timer | Automation | €20–40 |
Step-by-step installation
1. Drip irrigation network plan
Draw a diagram of your garden indicating the location of each plant. This reference helps calculate the useful pipe length and the number of drippers needed. A good tip: note the distance between each plant to avoid mistakes when drilling.
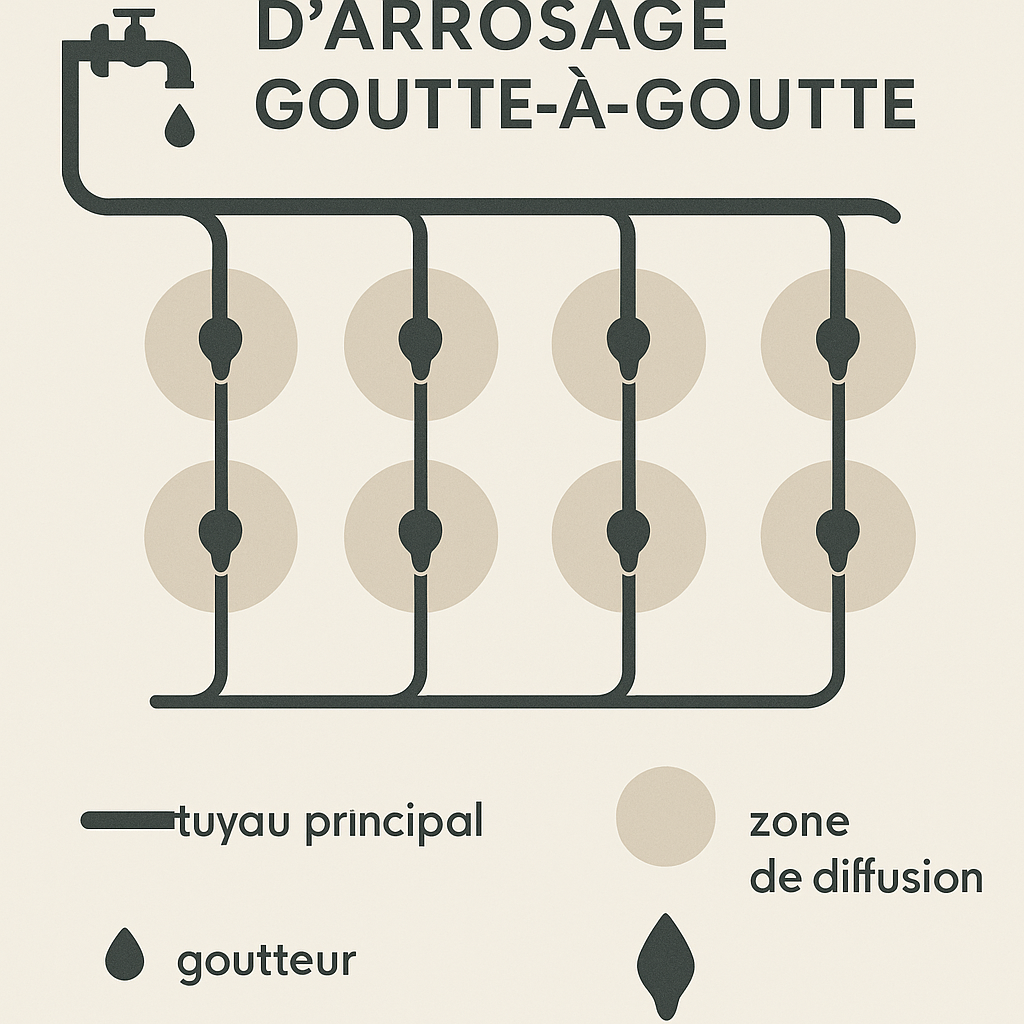
2. Laying the main piping
Lay the 16 mm pipe following your marked layout, securing it to the ground with plastic staples. Let it relax in the open air before stretching it to avoid unwanted bends. Cut to length with a pipe cutter for a clean cut without fraying.
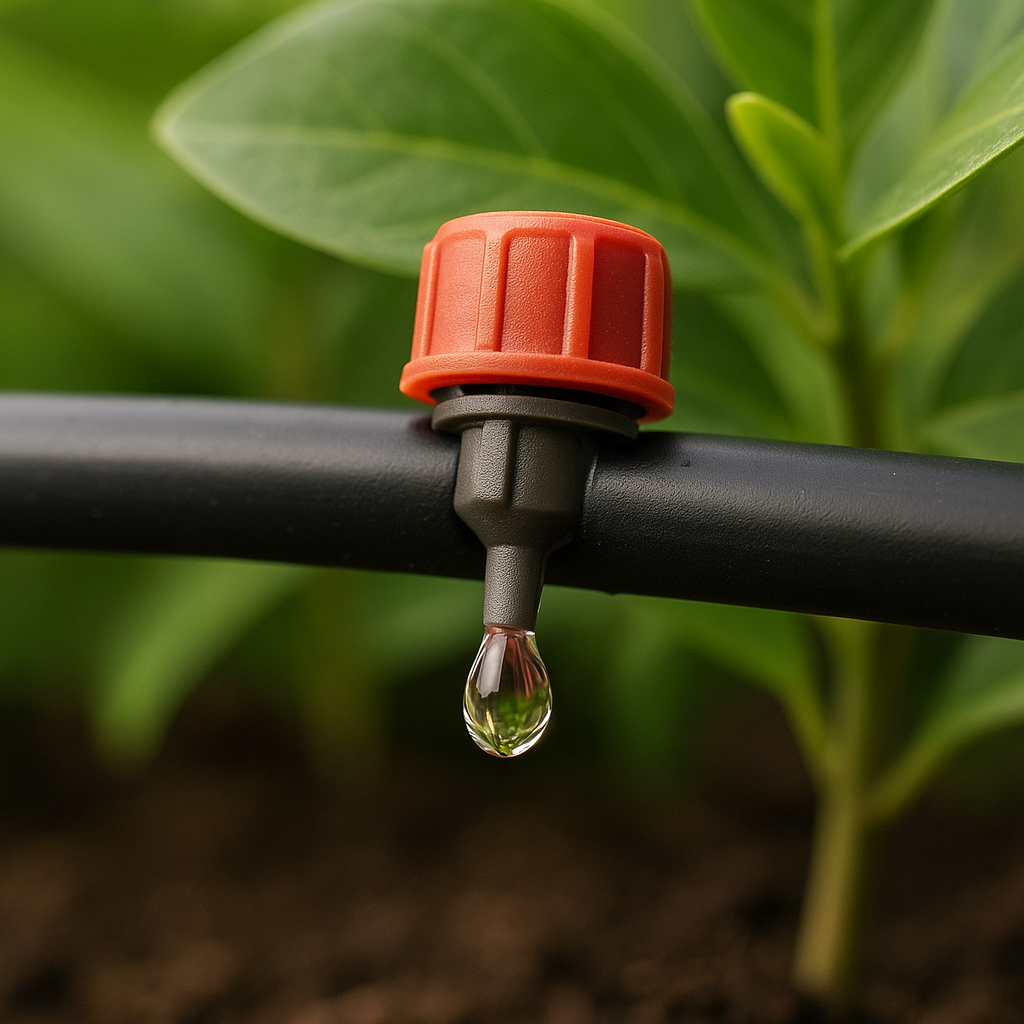
3. Installing emitters and fittings
Drill a hole in the main pipe, insert the dripper, then push it in until it is watertight. T and elbow fittings allow you to install branches to neighboring plots. Manually test each segment before pressurizing.
4. Connecting to the faucet and starting up
Screw on the filter then the timer before the main pipe. Set the time and watering frequency: 2 to 3 short cycles (5 to 10 minutes) per day are generally sufficient. Run the system for the first time while monitoring each dripper to detect any leaks or blockages.
Maintenance and adjustments
Over the season, lime and fine particles can clog the drippers. Plan for:
- Monthly cleaning of the filter
- Rinsing with vinegar water (1 part vinegar to 3 parts water) to descale the drippers
- Visual inspection of pipes before the freezing period
At the end of the season, drain the network then fold the pipes away from frost. This precaution prevents frozen water from cracking the conduits and causing leaks when restarting.
Installation summary and recommendations
Once installed, your drip irrigation transforms your garden management. You save time, control your water consumption, and provide an optimal environment for your plants. Feel free to gradually expand your network to include new flower beds or an orchard.
FAQ
- What flow rate should I choose for my drippers ?
- A flow rate of 4 L/h is suitable for most vegetables; count on 2 L/h for more delicate flowers and up to 8 L/h for demanding shrubs.
- How to protect the system from frost ?
- Completely drain your pipes and store them in a frost-free place. A waterproof timer can remain in place, but unplug it before the first frost.
- Can watering be automated at night ?
- Yes, watering at night limits evaporation. Program a cycle of 3 to 5 hours after sunset for optimal results.
- Is a specific timer necessary ?
- Choose a digital model with memory in case of a power outage. Some even include a rain sensor to automatically suspend watering.
- How to descale the drippers ?
- Prepare a vinegar-water solution, soak the disassembled emitters for 30 minutes, then rinse thoroughly with clear water.