Sommaire
Cleaning a Wooden Terrace Without Damaging It: The Gentle Method and the Right Products
To clean a wooden terrace without damaging it, first remove the furniture and debris, then lightly moisten the planks. Brush with water and a mild soap, always following the grain. Rinse with a moderate jet and let dry completely before assessing graying or applying protection.
The right method depends on the wood species, its age, its finish, and the observed dirt. This guide explains how to clean a wooden terrace step by step, choose a suitable product, treat moss or stains, and avoid actions that weaken the fibers.
In Brief
🧹 The basic method consists of sweeping, lightly moistening, brushing with mild soap, rinsing, and letting dry.
🌿 Black soap or a special wood cleaner is generally suitable for routine maintenance, after testing on a less visible area.
⚠️ High-pressure washers, pure bleach, metal brushes, and improvised mixtures can mark the wood or alter its finish.
🪵 Cleaning, de-graying, and protection are three different operations: natural graying does not automatically mean the planks are degraded.
Assessing the Condition of the Terrace Before Cleaning
A wooden terrace is an outdoor covering made of planks exposed to moisture, UV rays, dirt, and temperature variations. The preliminary diagnosis consists of identifying the material and distinguishing superficial dirt from actual wood deterioration.
The first step is to identify the wood species and the existing finish. Look for installation information, the invoice, or the maintenance manual. A terrace can be made of softwood, exotic wood, thermally treated wood, or composite, with oil, saturator, paint, or no visible protection.
Then observe the planks when dry. Dust, soil, and leaves are not treated the same way as moss, greasy stains, blackened areas, or graying. Also check the fastenings, cracks, splinters, loose planks, and places where water remains after rain.
- Spot green or slippery areas, often associated with moss or biological deposits.
- Look for planks whose fibers lift or become fuzzy.
- Check gaps and low points where water may stagnate.
- Test each new product on a small, less visible surface.
Natural Graying or Wood Degradation: Do Not Confuse
Graying is generally a natural evolution caused by UV, moisture, and weather. A gray tint therefore does not prove infestation or structural degradation of the planks.
A de-grayer can lighten the wood’s appearance, but it does not guarantee a return to the original shade. To know if a plank must be repaired or replaced, rather look for significant fragility, a deep crack, faulty fastening, or persistent deformation.
Remember: A gray terrace is not necessarily damaged: graying often results from the natural evolution of exterior wood.
Preparing the Terrace and Choosing the Right Washing Conditions
Before washing a wooden terrace, remove everything that blocks access to the planks. Complete preparation avoids moving dirt under the furniture and allows checking water drainage.
Remove furniture, pots, toys, and accessories. Then sweep leaves, sand, and small debris. Gently clear spaces between the planks with a non-cutting tool, then protect plants, walls, and surfaces sensitive to splashes.
Choose a mild, dry day with little sun. Avoid frost, high heat, and rain forecast just after washing. A product that dries too quickly can leave marks, while a terrace rinsed before a wet period may dry slowly.
Necessary Equipment for Manual Cleaning
- A broom-brush with soft or semi-rigid fibers.
- A clean bucket and a hose with a moderate jet.
- Gloves suitable for the product used.
- A soft brush for grooves and gaps.
- Protection for plants and neighboring walls.
The equipment must be clean and free of grease or abrasive particles. A scrub brush used to clean a very dirty surface can leave residues and scratch a recent finish.
Which products to use to clean a wooden terrace?
The cleaning product for a wooden terrace must correspond to the wood species, the condition of the boards, and the existing finish. Start with the mildest solution, follow the manufacturer’s instructions, and rinse thoroughly after application.
| Observed situation | Cautious option | Precaution |
|---|---|---|
| Common dirt | Warm water and mild soap or black soap | Dilute according to instructions and avoid excess product |
| Moss and green deposits | Cleaner compatible with exterior wood | Protect plants and rinse carefully |
| Grayed wood | Suitable brightener, after cleaning | Test locally and do not promise a new shade |
| Heavily soiled terrace | Wood detergent or product designed for this surface | Strictly respect the action time |
Mild soap and black soap for routine maintenance
Black soap can be suitable for common dirt when properly diluted and tested beforehand. A too concentrated solution can leave a film on the boards and complicate rinsing.
Use little product, brush without saturating the terrace with water, and rinse before the solution dries. Dosage recommendations vary according to the concentration of the black soap: the manufacturer’s instructions remain more reliable than a universal recipe.
Special cleaner for exterior wood
A cleaner designed for exterior wood can be useful when dirt is ingrained or when the existing finish requires a particular formula. Check its compatibility with exotic woods, softwoods, old or already treated wood.
Respect the application time indicated on the label. A prolonged action time does not necessarily improve the result and can alter the shade or finish.
Brightener and anti-moss treatment: two different uses
A brightener mainly acts on the gray appearance of the wood. An anti-moss treatment targets microorganisms and green deposits; it does not replace washing or improving water drainage.
Oxalic acid, also called sorrel salt, is used in some brightening products. This type of formula requires protection, a localized test, and rinsing according to the instructions.
Products and tools to avoid
- Pure bleach and highly concentrated recipes.
- Very acidic or very alkaline products without compatibility validation.
- Abrasive powders, aggressive scrapers, and wire brushes.
- Mixtures of household products, whose reactions are unpredictable.
White vinegar and baking soda are sometimes suggested for green deposits, but their compatibility with all wood species and finishes is not guaranteed. A discreet test and thorough rinsing are essential.
Cleaning a wooden terrace step by step
The manual method is suitable for most maintenance cleanings when the boards are accessible and do not show significant damage. Work in small areas, from the farthest point toward the exit, so as not to walk on a still soapy surface.
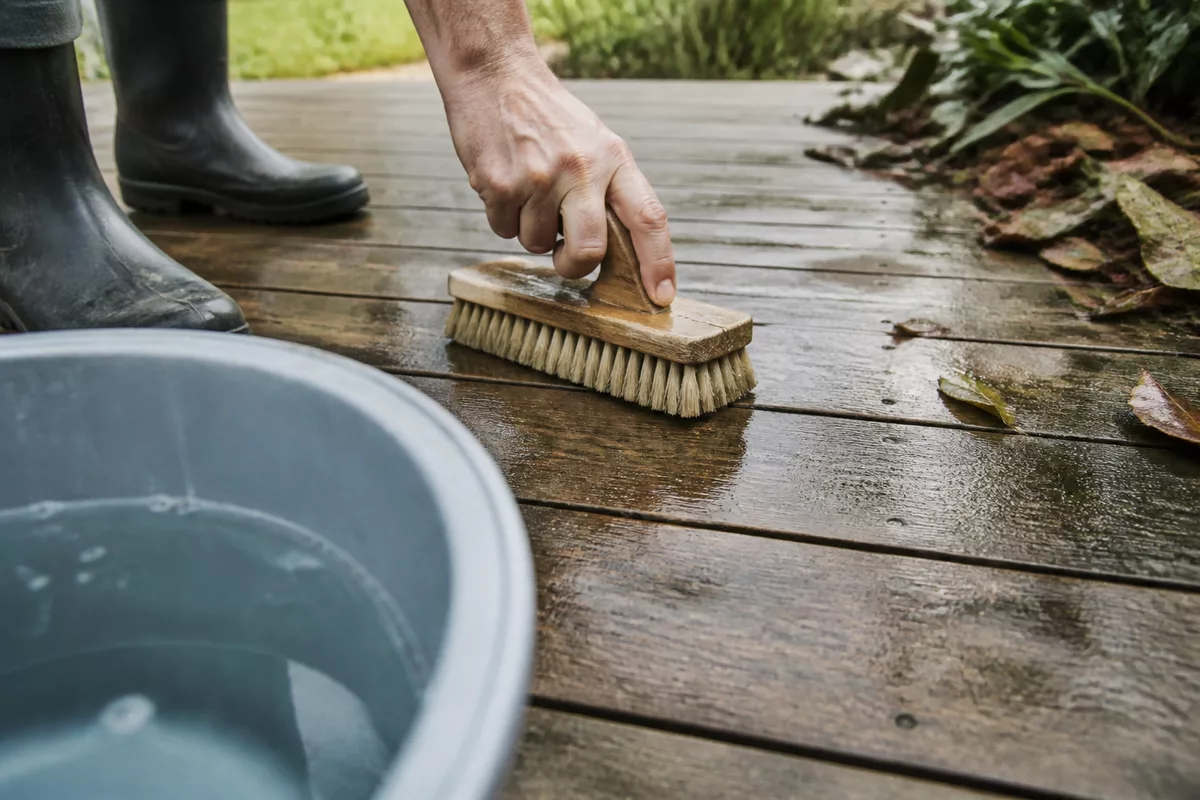
Step 1: Slightly moisten the boards
Wet the surface without soaking it. Light moistening limits the product’s too rapid absorption and facilitates the removal of dirt.
Avoid puddles and watch the joints. Water that stagnates in the gaps slows drying and can promote the return of green deposits.
Step 2: Apply the appropriate product
Prepare the solution according to the instructions. Spread it evenly with a scrub brush, working on a small area at a time.
The product must not dry on the boards. If the terrace is large or exposed to wind, further reduce the treated surface at the same time.
Step 3: Brush without digging into the wood
Move the brush in the direction of the wood fibers. Start with moderate pressure, then gradually insist in the grooves, joints, and shaded areas.
Reduce pressure if the fibers lift or if the surface becomes fuzzy. A wire brush or brushing against the grain can permanently mark the boards.
Step 4: Rinse with a moderate water jet
Rinse thoroughly with clear water before residues dry. Direct the jet in the direction of the fibers and check the gaps to avoid product accumulation.
Insufficient rinsing can leave a soapy film or whitish marks. Drain the dirty water to a suitable area, taking into account plants and sensitive surfaces.
Step 5: Let dry completely
Wait until the wood is evenly dry before replacing furniture or applying a finish. Thick, shaded, or poorly ventilated boards may require several days of drying.
Then re-examine the surface. Dry wood allows distinguishing residual dirt, natural graying, and a truly weakened area.
Remember: Rinsing and drying determine the final cleanliness and compatibility of any possible protection.
Pressure washer: why you need to be cautious
The pressure washer is not the reference method for cleaning a wooden terrace. A jet that is too powerful can mark the fibers, lift the surface, and increase splinters, especially on soft, old, grooved, or already weakened wood.
Manual washing generally offers better control of pressure and action time. This option also limits the risk of locally digging into a board by insisting with the machine.
If a machine is considered, check the recommendations of the wood or finish manufacturer. Use low pressure, keep a sufficient distance, constantly move the jet, and test on a discreet area.
Never direct the jet perpendicular to the fibers and do not insist on the same board. When in doubt, the brush and moderate rinsing remain preferable.
Common mistakes that most often damage a wooden terrace
- Cleaning in full sun, freezing weather, or just before a rainy period.
- Letting the product dry on the boards.
- Brushing against the grain or with excessive pressure.
- Applying a finish on damp or poorly rinsed wood.
- Neglecting areas that retain water and spaces between the boards.
Treating moss, graying, and localized stains
Targeted treatment avoids applying a strong product over the entire terrace. First identify the cause: moss, green deposit, grease, food, soil, wet pot, or simple color change.
Remember: A localized stain first calls for a localized action: treating the entire terrace with an aggressive product increases risk without guaranteeing a better result.
Removing moss and green marks
Carefully remove visible clumps, then clean the affected areas with a solution compatible with wood. Green deposits can make a terrace slippery, especially in shaded and damp parts.
Then improve water drainage and air circulation. Regularly remove leaves and move pots or furniture that maintain permanent humidity away.
Degraying a wooden terrace
Clean and rinse the terrace before applying a degrayer. Follow the instructions, perform a localized test, and rinse carefully after the action time.
Degraying is an aesthetic or preparatory operation, not a requirement after every wash. Naturally grayed wood can remain healthy, even if its shade does not return to that of a new board.
Removing grease, food, or pot stains
Act quickly with a gentle product and a gradual action. Dab greasy stains before gently brushing, then rinse the area without spreading the dirt.
Remove sources of moisture under pots and furniture. For a stubborn stain, test a suitable product on a less visible area before extending the treatment.
Protecting wood after cleaning and organizing its maintenance
A saturator, oil, or other exterior finish should only be applied to clean, dry wood free of any residue. The protection must be compatible with the wood species and the treatment already present.
Respect the weather conditions, drying time, and the number of coats indicated by the manufacturer. Applying a finish too early can trap moisture or create an uneven appearance.
Film-forming products and saturators do not behave the same way. A saturator penetrates more deeply into the substrate, while a film-forming finish creates a film that can flake if the substrate is poorly prepared.
How often should a wooden deck be cleaned?
Light maintenance in spring and autumn is a practical guideline, to be adjusted according to exposure, climate, and usage. Manufacturer maintenance recommendations should take precedence when available.
The frequency should mainly follow the appearance of dirt and stagnant moisture. Regularly remove leaves, soil, and accumulated water, then check fastenings, cracks, splinters, joints, and areas that are turning green.
An exotic wood deck can receive a saturator as part of periodic maintenance, but the frequency depends on the product and the desired appearance. A composite deck requires a different method: check its instructions and do not automatically apply a product intended for natural wood.
If a board is very cracked, unstable, warped, or shows structural weakness, cleaning will not be enough. Repair or professional intervention may become necessary.
Sources
Adapt these tips to the wood species, its finish, and the instructions from the deck or product manufacturer.
Key takeaways
- 🧹 Sweep and inspect the boards before adding water or a product.
- 🪵 Brush in the direction of the grain with a mild soap or a compatible cleaner.
- 💧 Rinse with a moderate jet and remove residues from the gaps.
- 🌤️ Let dry completely before any graying treatment, saturator, or replacing furniture.
- ⚠️ Reserve the pressure washer for compatible situations and after a discreet test.
Frequently asked questions
Can you clean a wooden deck with black soap?
Yes, black soap can be suitable for routine maintenance of a wooden deck if properly diluted. Always test the solution on a less visible area, avoid excess product, and rinse thoroughly.
Is a pressure washer not recommended for a wooden deck?
The pressure washer poses a risk to the fibers, especially on soft, old, or weakened wood. Manual washing is generally easier to control; if a machine is used, perform a test at low pressure and from a sufficient distance.
How to clean a wooden deck that has turned gray?
Start with a gentle cleaning, then rinse and let dry. A graying treatment can then alter the wood’s appearance, but natural graying does not guarantee a return to the original color.
How to remove moss without damaging the wood?
Remove visible clumps without aggressive scraping, then use a treatment compatible with the wood. Brush gently, rinse with a moderate flow, and improve water drainage to limit the return of green deposits.
When to apply a saturator after cleaning?
Apply a saturator only when the wood is perfectly dry, clean, and compatible with the product. Respect weather conditions, drying time, and the manufacturer’s instructions.