
Sommaire
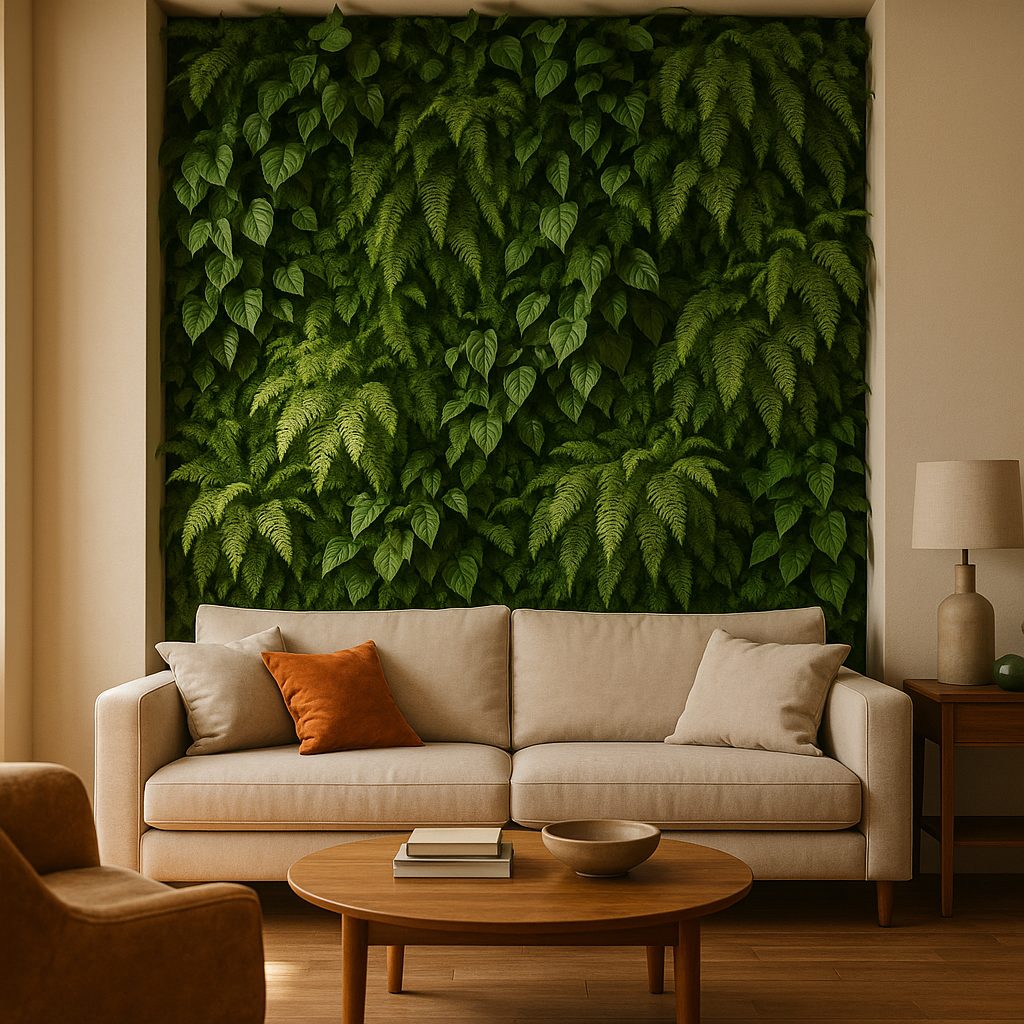
An indoor green wall transforms a dull wall into a true living element: it captures the eye, purifies the air, and instantly brings visual comfort. This guide accompanies you from choosing the location to maintenance actions, including plant selection and setting up a reliable watering system. Whether you are considering a small green column or an entire wall, you will find concrete advice here to successfully complete your project without improvisation.
In Brief
🌷 Essential choice: favor a wall with **indirect light** and a suitable structure (prefabricated module, pockets, or tray). Lighting dictates plant selection and watering frequency.
🛸 Pragmatic installation: a green wall consists of **support**, **substrate**, **irrigation system**, and **plants**. You can assemble it in a few hours if you prepare materials and tools.
📡 Realistic maintenance: count on **10 to 30 minutes per week** to monitor humidity, pruning, and pests. Automatic watering reduces work but requires initial setup.
Why Install an Indoor Green Wall?
More than decoration, the green wall meets several objectives: aesthetic, well-being, and technical. Visually, it creates a focal point and softens rigid architectural lines. Physiologically, certain plants help reduce dust and improve air quality. Finally, acoustically, a vegetated surface slows reverberations in an open space. These benefits are concrete but depend on good plant choices and regular maintenance — a poorly designed wall quickly becomes a source of humidity and costly upkeep.
Choosing the Location and Structure
Assessing Light and Humidity
Observe your wall over several days: is the light direct in the morning, filtered in the afternoon, or nonexistent? Indoor plants are grouped into broad families according to exposure: bright, semi-shaded, shaded. The room’s relative humidity also matters — a well-ventilated bathroom can accommodate ferns, while a dry living room will favor suitable succulents.
Possible Types of Structures
Three approaches dominate:
- Prefabricated modules: quick to install, often equipped with a reservoir and an integrated irrigation system.
- Textile pockets: lightweight, allow modular setup and manual watering maintenance.
- Frames or trays on shelves: simple solution for beginners, facilitates plant rotation and replacement.
Choosing comes down to balancing aesthetics, ease of installation, and budget. High-end modules cost more but reduce errors for a first wall.
Plant selection: criteria and suggestions
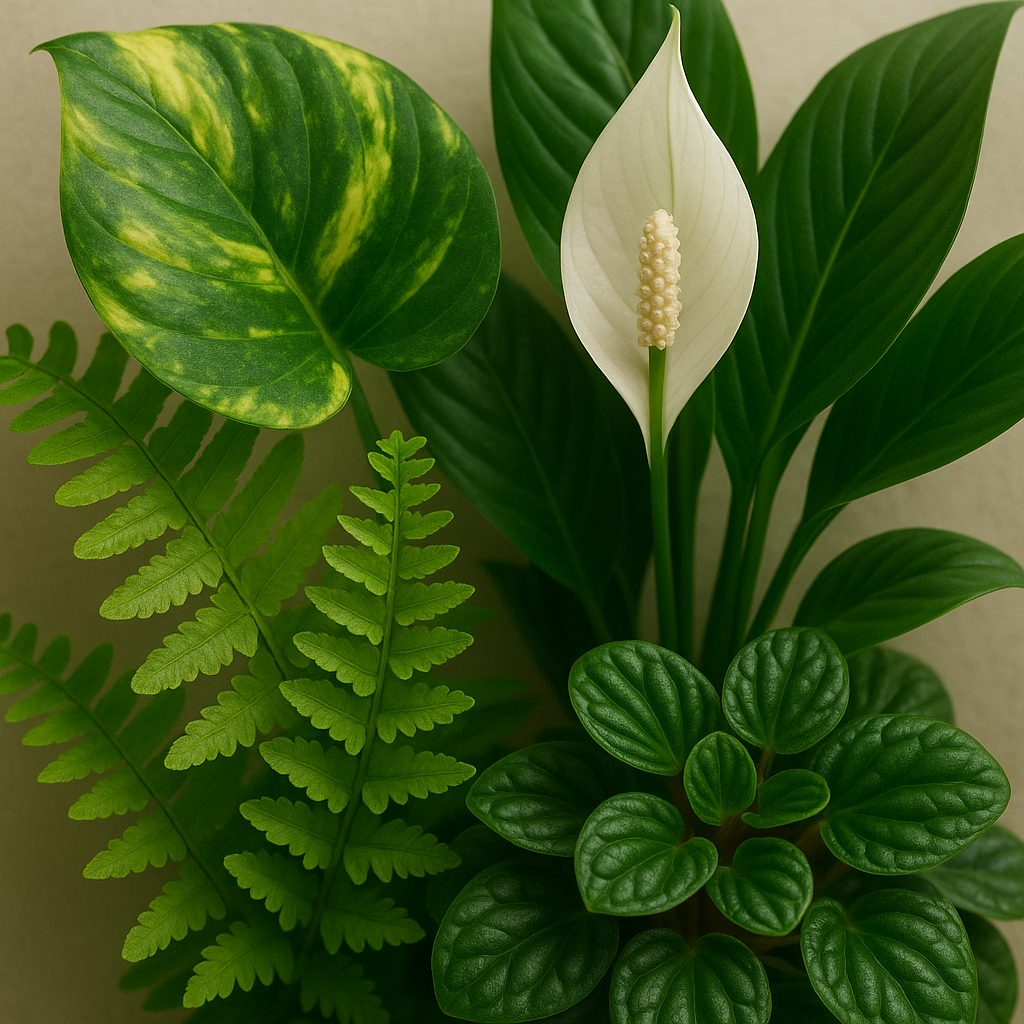
Plant diversity creates relief, but light requirements and water needs must be balanced. Mixing low and trailing plants adds depth. Prefer robust and tolerant species to variations to limit risks:
- Plants for indirect light: Spathiphyllum (peace lily), Schefflera, Pothos.
- Plants for partial shade: Boston fern, Calathea, Aglaonema.
- Plants for low light: Sansevieria, Zamioculcas.
Here is a useful summary table to help decide:
| Plant | Light | Watering | Asset |
|---|---|---|---|
| Pothos (Epipremnum) | Indirect to partial shade | Once a week | Trailing, very resistant |
| Spathiphyllum | Indirect | Once a week (light) | Blooms, purifies air |
| Boston fern | Partial shade | Twice a week (likes humidity) | Dense effect, good acoustic management |
| Sansevieria | Low light | Once every 2-3 weeks | Very robust, minimalist |
| Peperomia | Indirect | Once every 10-14 days | Varied foliage, compact |
Step-by-step installation
Equipment and preparation
Gather: chosen structure, screws adapted to the wall type, light substrate (mix of coconut fiber and potting soil), pots, irrigation pump (if needed), hoses and timer. Measure the space precisely and draw a rough plan to distribute trailing plants and surface plants. Providing a wall protection (waterproofing) prevents underlying humidity problems.
Implementation
- Attach the structure to the wall respecting the total load (soil + water + plants).
- Install the waterproofing sheet and, if necessary, the insulating frame to separate wall and structure.
- Place the substrate and plant holders, then plant the vegetation starting with vertically growing subjects, then trailing ones.
- Test the watering system: check tightness, flow rate and even distribution before fully filling the substrate.
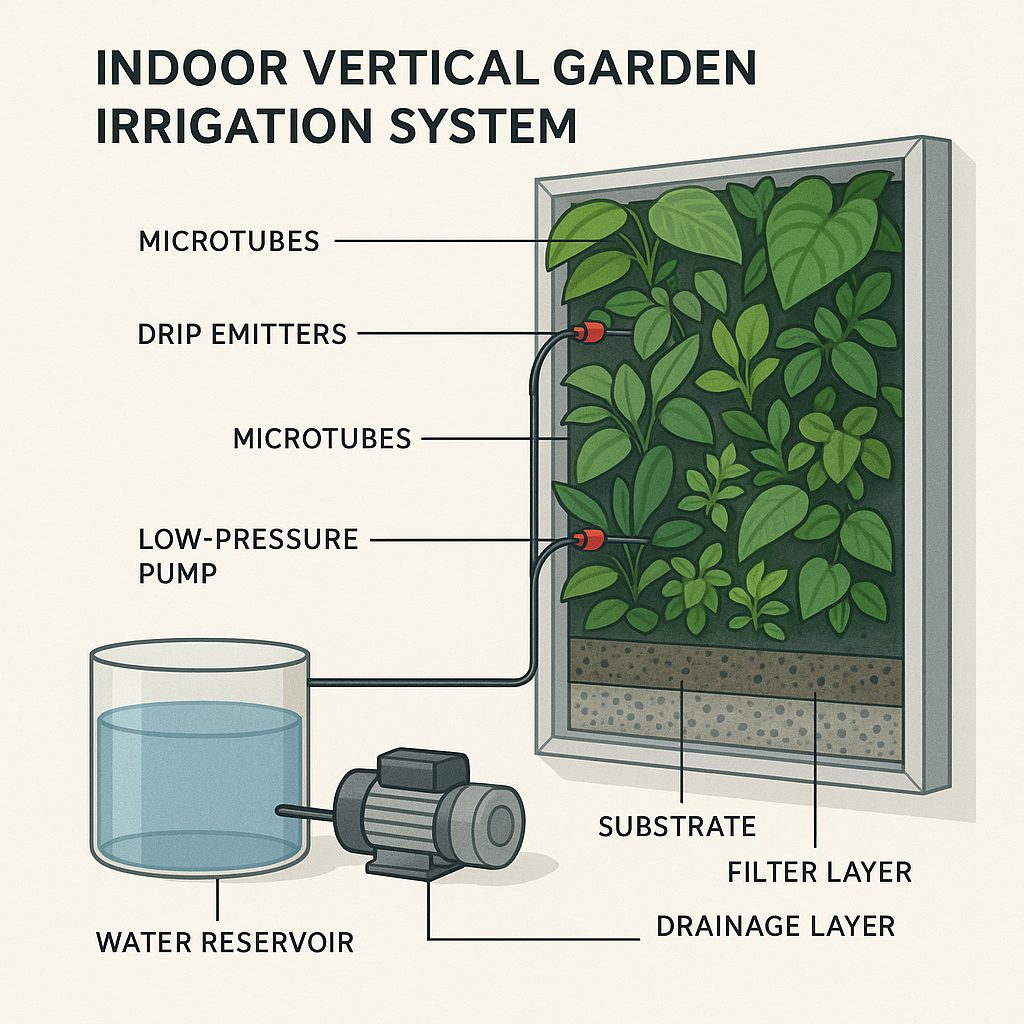
Watering system and substrate
The substrate must be light, retain water but allow drainage. Mixes based on coconut fiber, perlite and a bit of universal potting soil work well. Automated watering with a low-pressure pump and microtubes ensures regular humidification and limits manual watering. Choose a programmable timer and ideally a humidity sensor to refine frequency: less water is often better than excess that suffocates roots.
Practical advice
- Avoid overly compact substrates — freshness and oxygenation of roots are key.
- Plan for runoff water recovery if possible to avoid damage to the floor.
- If you are a beginner, test a small wall to adjust the system before investing in a large surface.
Routine maintenance and problem prevention
Monitor humidity, growth, and signs of stress (yellow leaves, spots, wilting). Structural pruning maintains the pattern’s readability, while occasional replacement of diseased plants prevents pest spread. For fertilization, a diluted liquid feed every 4 to 6 weeks is sufficient indoors; it is better to under-fertilize than to over-fertilize.
Here are some weekly actions to incorporate:
- Check substrate moisture at different levels of the wall.
- Remove dead leaves and dust to preserve photosynthesis.
- Inspect the pump and pipes for blockages or leaks.
Costs, budget, and alternatives
The price varies greatly depending on the surface area, the quality of the structure, and the sophistication of the irrigation system. For a small DIY installation (1–2 m²), budgeting between €150 and €600 is realistic. Custom systems and professional installations for large surfaces can exceed several thousand euros. Consider economical alternatives: pot frames, vegetated shelves, or stacked planters offer a similar look without heavy investment.
FAQ
Which wall should be chosen to avoid humidity problems?
Prefer a well-ventilated interior wall and apply a waterproof membrane between the wall and the structure. Interior load-bearing walls (concrete/board) are better suited than thin partitions that may absorb moisture.
Can a green wall be installed without automatic watering?
Yes, for small surfaces or pot compositions, manual watering remains viable. However, for wide and dense walls, automation reduces the risk of forgetting and ensures even water distribution.
How long does a green wall last?
With a good choice of plants and appropriate maintenance, a well-built wall can last for years. Longevity mainly depends on water management, renewal of aging plants, and disease prevention.
Can a green wall be used in a professional environment (offices)?
Yes: it provides visual comfort, stress reduction, and sound attenuation. In a professional setting, favor modular systems that are easy to maintain and a selection of robust plants to limit technical interventions.
Practical resources: tools and supplies
- Drill and anchors suitable for the wall type
- Bubble level and tape measure
- Light substrate (coconut fiber + perlite)
- Low-pressure submersible pump, tubes, and drippers
- Programmable timer and humidity sensor (optional)
Tip: test the wall during the first 2 months by noting watering frequency and dry areas. These observations will save you costly adjustments later.
{
“@context”: “https://schema.org”,
“@type”: “WebPage”,
“about”: {
“@type”: “Thing”,
“name”: “indoor green wall”
},
“keywords”: [“green wall”,”indoor plants”,”maintenance”,”installation”,”watering”]
}