
Sommaire
Installing a wooden fence with your own hands combines aesthetics, durability, and personal satisfaction. Whether you want to define a vegetable garden or create a privacy hedge, every step counts: from choosing the material to applying the finishing touches. Follow this guide to avoid common pitfalls and successfully complete a project that enhances your outdoor space.
In Brief
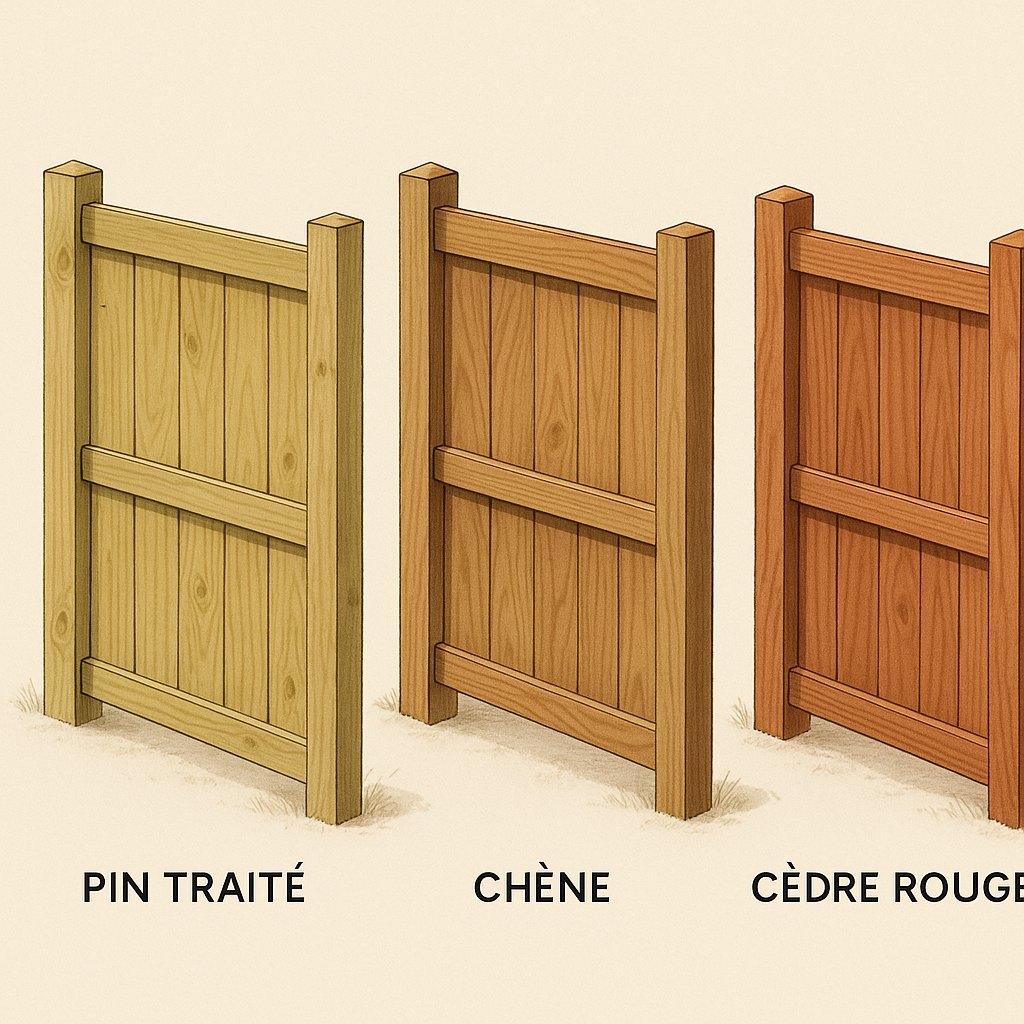
🌲 Varied wood species: treated pine, oak, or red cedar stand out for their durability and price. Choose according to the climate and your budget.
📏 Careful layout: a precise marking and a leveled ground ensure alignment. Prepare stakes, string line, and a spirit level for a flawless result.
🛠️ Post installation: dig 80 cm deep, set in concrete, and check the plumb. This is the most critical step for long-term stability.
🎨 Finishing and maintenance: stain or paint quickly after assembly, then renew the treatment every 3 to 5 years to preserve the wood’s natural shine and protection.
Choosing the Right Wood for Your Fence
The choice of wood species determines the longevity and natural appearance of your fence. Pressure-treated pine remains economical and resistant to insect attacks, while oak or red cedar offer better durability without chemical treatment. Depending on the desired look, some will prefer the pronounced grain of oak, others the warm tone of cedar.
Comparison of Wood Species
| Species | Durability | Weather Resistance | Price per m² |
|---|---|---|---|
| Pressure-treated pine | 3–5 years | Good | 15–25 € |
| Oak | 10–12 years | Excellent | 40–60 € |
| Red cedar | 8–10 years | Very good | 35–50 € |
| Douglas fir | 7–9 years | Good | 30–45 € |
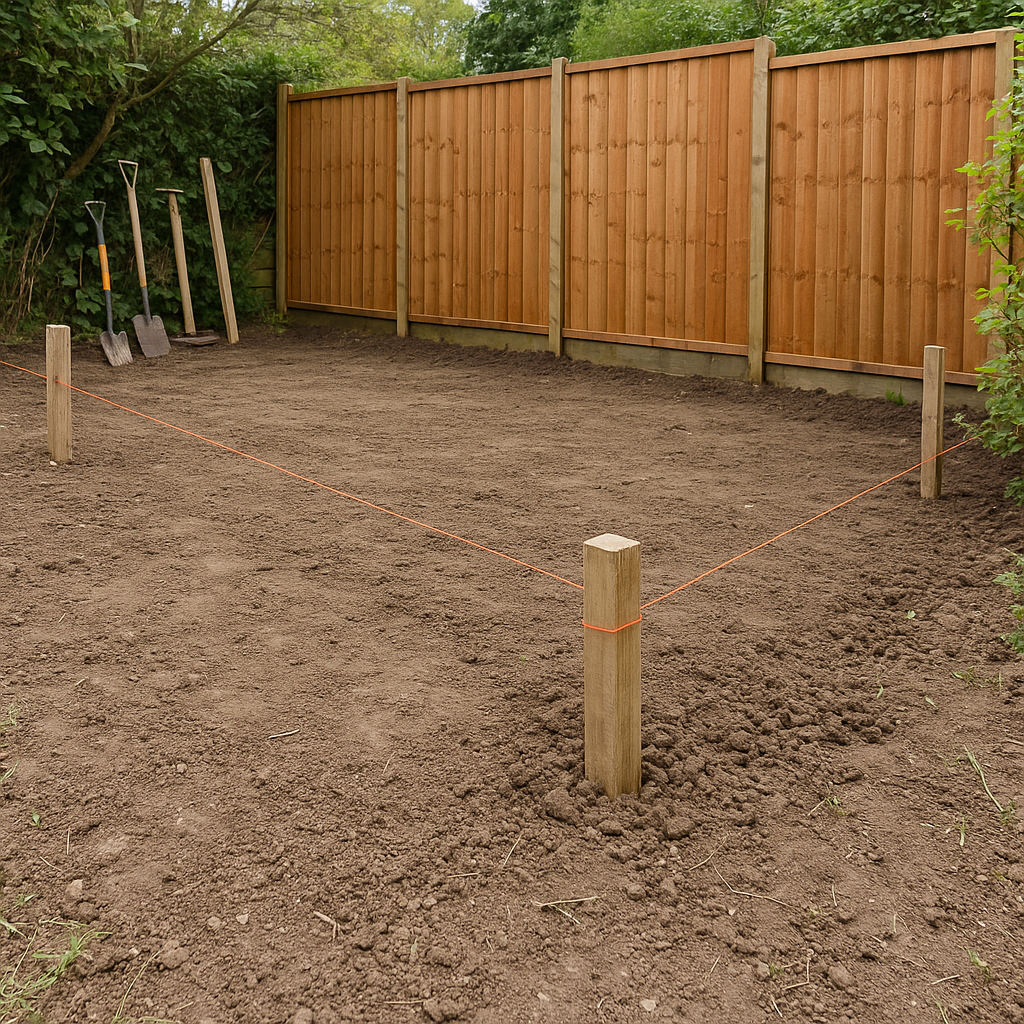
Preparing the Ground and Defining the Layout
A precise layout relies on well-leveled and stabilized ground. Start by clearing the area: remove stones and vegetation, and ensure that the slope promotes water drainage. Respecting regulatory distances and consulting the Local Urban Plan are essential if your property borders a public road.
Necessary Tools and Materials
- Chalk line and marking stakes
- Spirit level and plumb line
- Shovel, pickaxe, and mason’s ruler
- Hammer and mallet
- Marker or temporary spray paint
Tip: mark the post locations using a space equivalent to the width of the panels plus 2 to 3 cm to facilitate the passage of the slats.
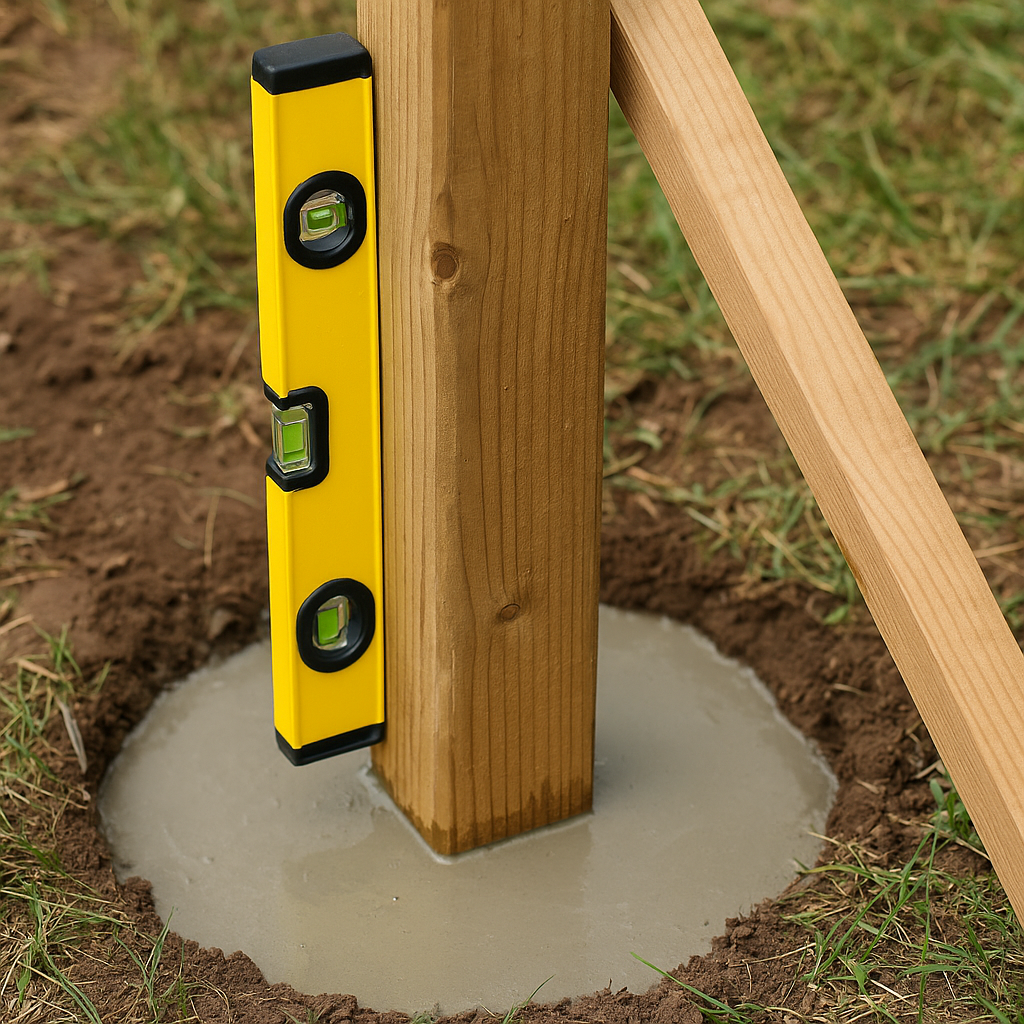
Installing the Posts: The Key Step
This phase determines the stability and longevity of the whole structure. Each post must be planted at least 60 cm deep (80 cm in windy areas), in a hole about 30 cm in diameter. Seal with concrete, respecting a slight slope outward to drain rainwater.
Materials for Foundations
- Wooden posts (recommended section: minimum 9×9 cm)
- Ready-mix concrete
- Fine sand for initial leveling
- Temporary stake to maintain vertical alignment
- Level and chalk line
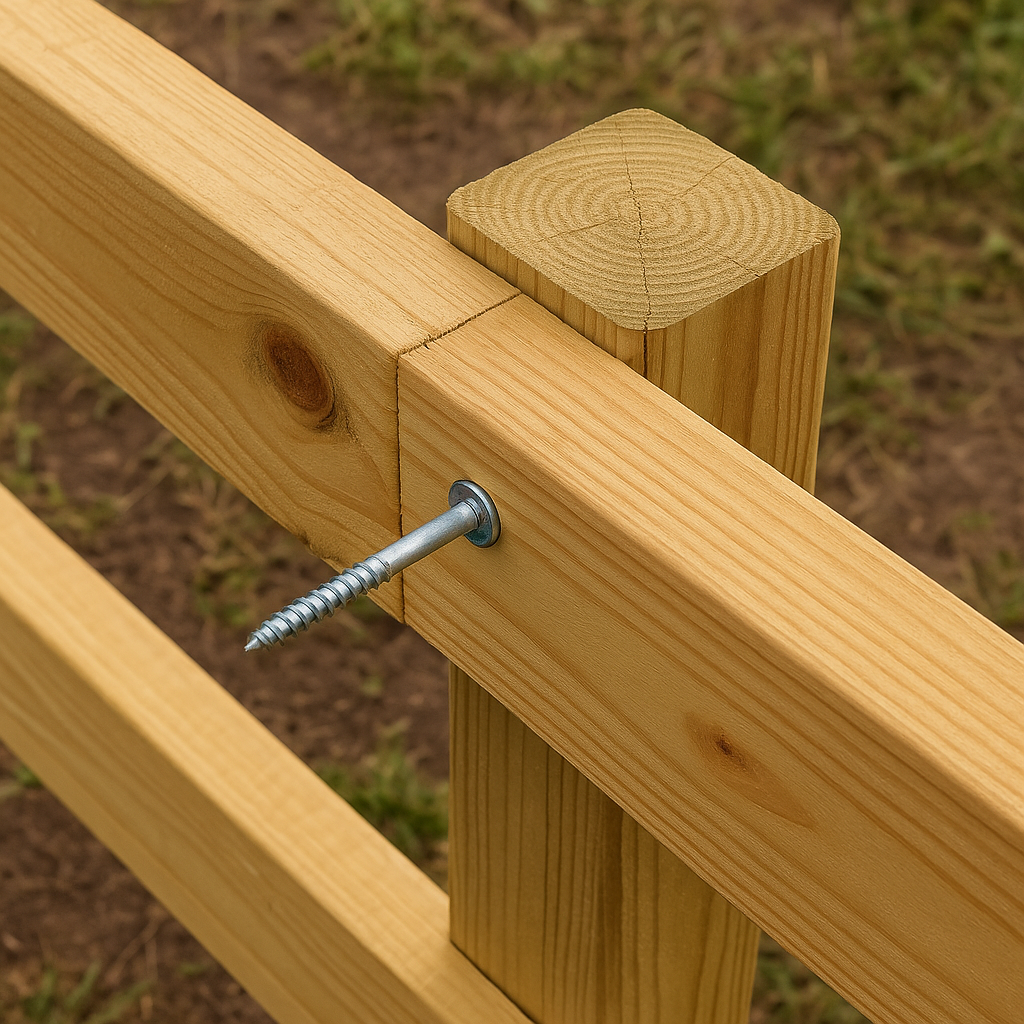
Attaching the Rails and Slats
Once the posts are well solidified, start with the horizontal rails: they serve as support for the slats and stabilize the structure. Use galvanized screws to prevent corrosion and maintain regular spacing for a uniform appearance.
Fixing Tips
- Prefer stainless steel or galvanized screws
- Drill a pilot hole to avoid splitting
- Check horizontality at each rail
- If installing staggered slats, space them 5 mm apart
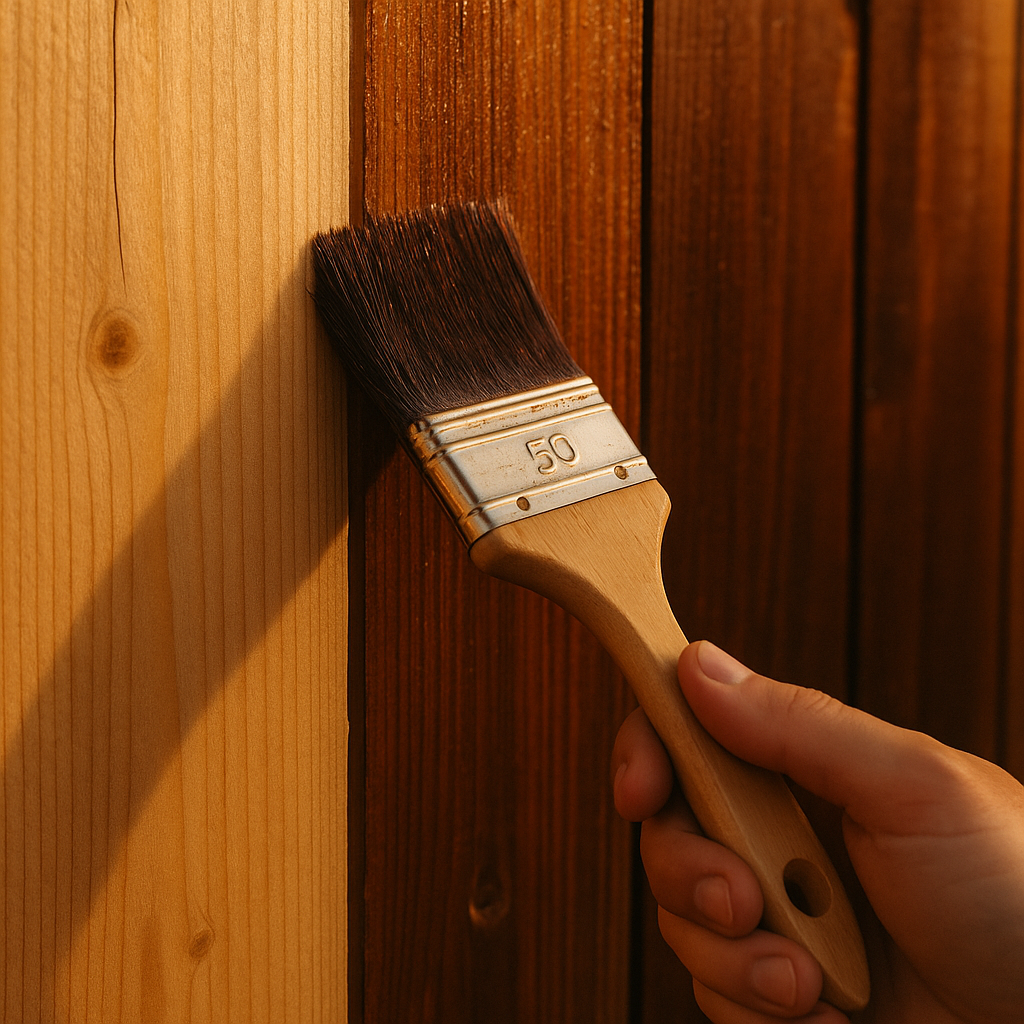
Finishing: Stain, Paint, and Maintenance
Raw wood can dull or crack without protection. Apply a microporous stain, which protects against UV rays while allowing the material to breathe. Two coats are generally necessary, with light sanding between each application.
Regular Maintenance
- Clean with a water jet during dry seasons
- Tighten screws and replace damaged slats
- Perform a new treatment every 3 to 5 years
FAQ
Can I install my fence alone?
Absolutely. With a good plan, some basic tools, and a bit of method, a motivated DIYer can carry out this project. If in doubt about alignment, call on a third party to check the verticality.
What depth for the posts?
As a general rule, 60 cm is sufficient in sheltered ground, but 80 cm is recommended in windy areas. The deeper the post is sealed, the more the fence will resist bad weather.
How to protect wood from insects?
The simplest solution is to choose pressure-treated wood or apply a water-based wood insecticide before installation. This treatment must be renewed during major renovations.
Is a building permit required?
For a fence less than 2 m high, a simple prior declaration of work is often sufficient. Beyond that, check your municipality’s urban planning rules.