
Sommaire
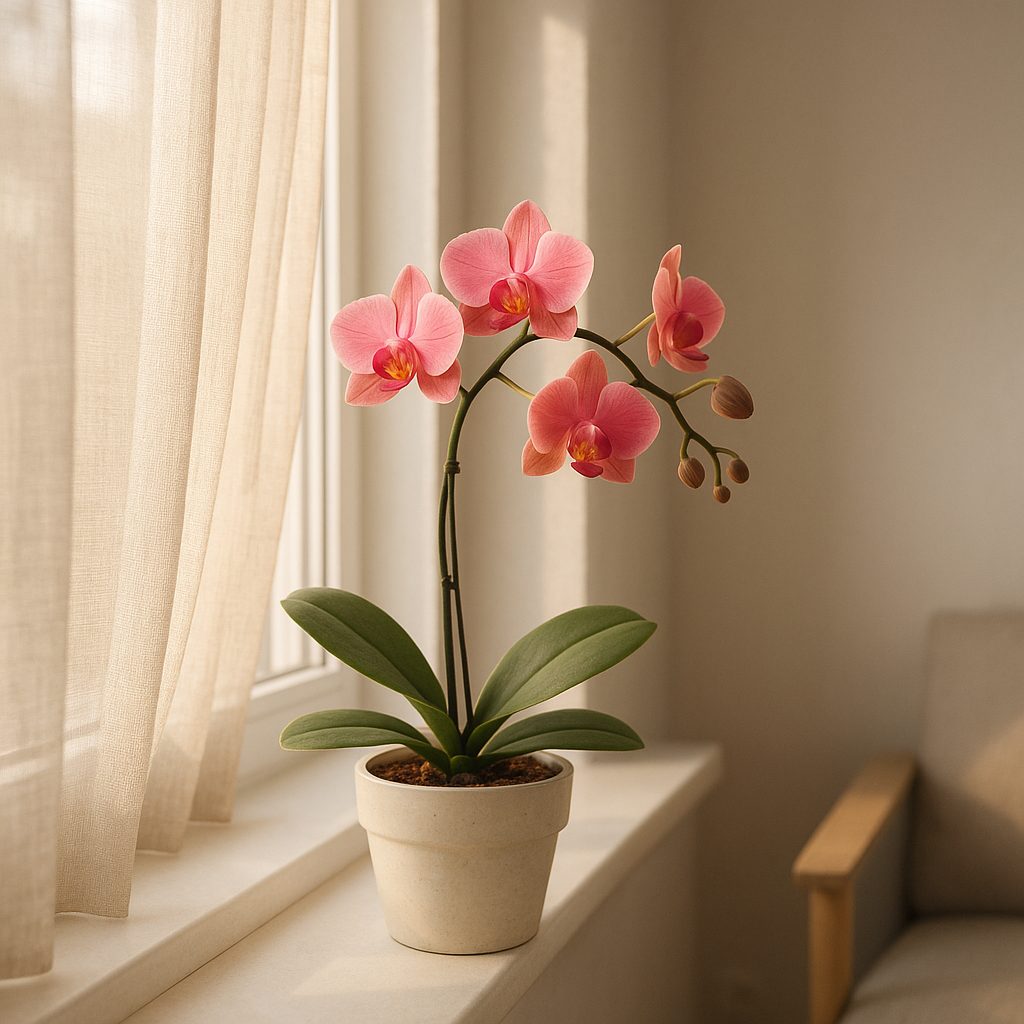
Keeping an orchid healthy at home requires some observation, a few regular actions, and understanding its particular needs. Many think these plants are fragile and finicky; in reality, they follow a fairly consistent ecological logic. This guide provides you with concrete routines, mistakes to avoid, and visual tips to quickly recognize the state of your plant — without scientific jargon or miracle recipes.
In brief
🌷 Watering: favor moderate and regular watering — about once a week indoors, less in winter; check the roots before watering.
☀️ Light: place the orchid near a bright window but without direct scorching sun; indirect light promotes flowering.
🧴 Substrate & repotting: use an airy mix (bark, charcoal, sphagnum) and repot every 1 to 3 years depending on the condition of the roots.
🧪 Fertilization: moderate supply of suitable fertilizer (balanced NPK or orchid-specific) during the growth period, with pure waterings between fertilizations.
Understanding the orchid: what it “tells you”
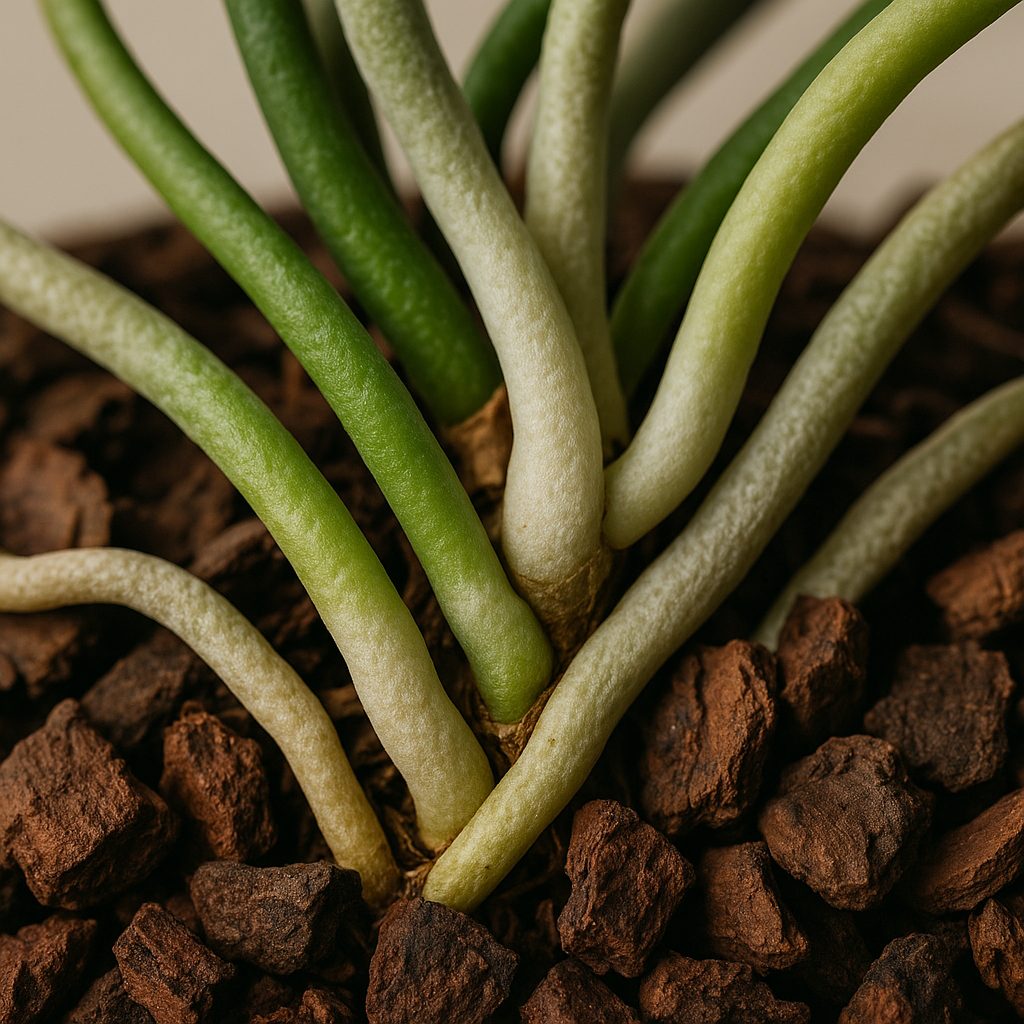
An indoor orchid is above all an epiphyte in its natural environment: it likes air around its roots and intermittent supplies of water and nutrients. One might think it demands rich soil; in truth, it hates waterlogging. Symptoms are often readable: limp leaves indicate excess water, purple or green roots indicate good hydration, white/gray roots indicate dryness. Observing, rather than guessing, remains the best method.
Location and brightness
Light is the most decisive factor to trigger or maintain flowering. The ideal: a window facing east or west for gentle lighting in the morning or late afternoon. In summer, protect the plant from direct sun with a sheer curtain; in winter, bring it closer to the light source or add an LED supplement if the room is dark. Beware of cold drafts or direct heaters: they quickly dry out leaves and roots.
Signs of good light
- Leaves of a clear and deep green (neither too dark nor pale).
- Flower buds forming after a stable period.
- External roots turning green after watering, a sign of activity.
Watering: frequency, technique, and common mistakes
The reputation of orchids being difficult often comes from improper watering. Rather than following a strict schedule, learn to judge by the substrate and the roots. If the mix is still moist, wait; if the roots are sparse and dry, it’s the signal to water. Use water at room temperature, preferably non-calcareous (filtered or rainwater).
Recommended technique
- Water by soaking the pot in lukewarm water for 10 to 20 minutes then let it drain well.
- Avoid stagnant water in the saucer: the roots need to breathe.
- Indoors, generally water once a week during the active period, every 10–14 days in winter.
| Season | Indicative frequency | Remarks |
|---|---|---|
| Spring | Once a week | Growth phase, increase slightly if high heat |
| Summer | 1 to 2 times a week | Watch evaporation; monitor the substrate |
| Autumn | Once every 10 days | Gradual reduction |
| Winter | Once every 2 weeks | Cooling and reduced activity |
Common mistake: watering “by feel” without checking the substrate. Result: rotting roots or aborted flowering.
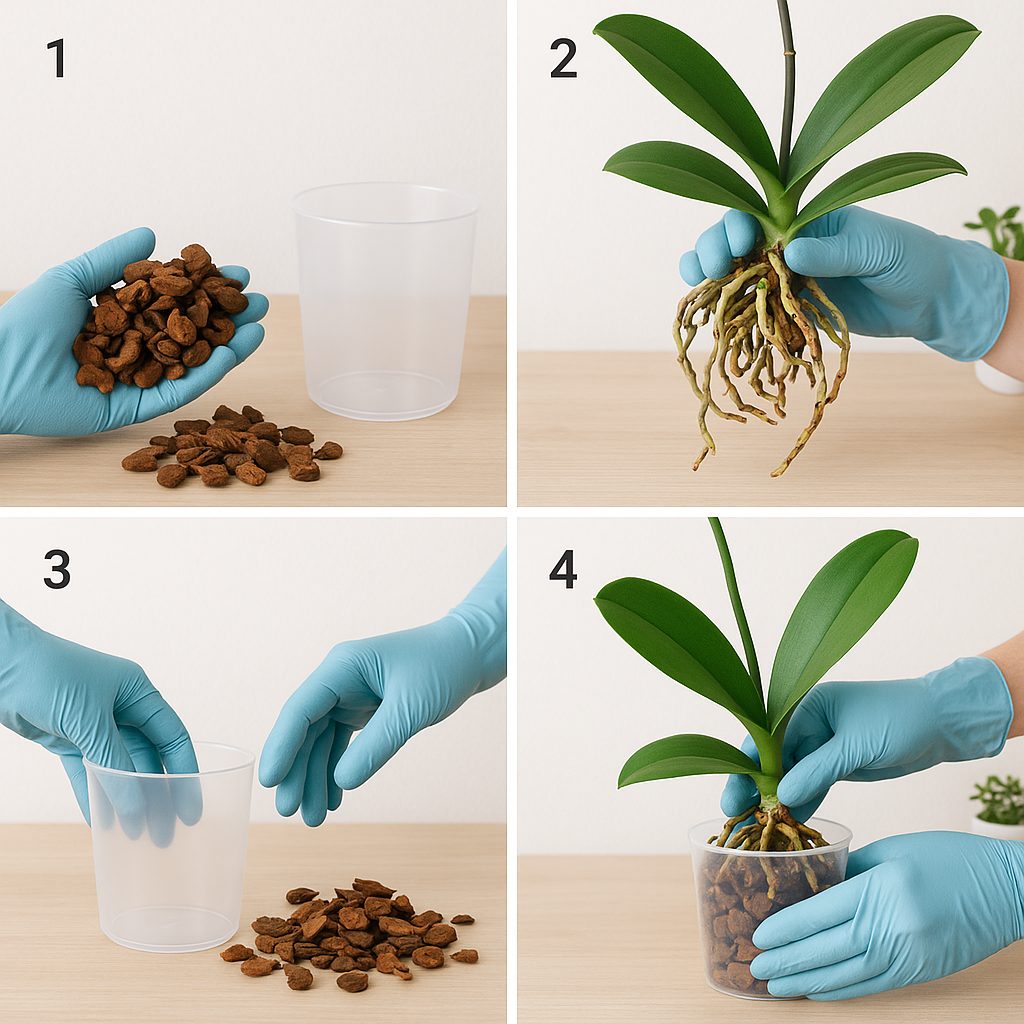
Substrate and repotting
A good orchid substrate favors air circulation: coarse pine bark, charcoal, clay pellets, or sphagnum moss for certain species. Repotting is not annual: change the pot when the substrate is decomposed or the roots invade the pot. Repotting too often stresses the plant; too rarely, the mix compacts and retains moisture.
When to repot
- Decomposed and compacted substrate.
- Obvious presence of fungi or unpleasant odors.
- After a long flowering, if the plant has stopped growing.
Short repotting procedure
Gently remove the plant, get rid of the old substrate, trim dead roots, let dry for a few hours if necessary, then place in a slightly larger pot with fresh, airy substrate. Avoid burying the crown; keep it level with the pot edge to prevent rot.
Fertilizers and additional care
Orchids benefit from a regular but light supply of specific fertilizer. An effective schedule: half dose of fertilizer every ten days during growth, or a single treatment every 2–4 weeks depending on concentration. Alternate pure water and fertilized water to avoid salt buildup.
Useful products
- Liquid fertilizer special for orchids (balanced NPK formula or 20-20-20)
- Natural fungicide in case of mold traces (apply locally)
- Sphagnum or moss to maintain ambient humidity without excess
Common diseases and pests
Common attacks: scale insects, aphids, and red spider mites. They are often detected by sticky spots, discolorations, or fine dust on the leaves. Regular inspection allows early intervention. Prefer mechanical treatments (brushing, 70° alcohol on cotton) before resorting to pesticides.
Signs and Quick Reactions
- Sticky leaves → look for honeydew (scale insects).
- Black spots at the collar → possible rot: remove affected parts and improve aeration.
- Yellow leaves without spots → probable water stress.
Advanced Tips to Promote Flowering
To trigger a new flowering, create a slight controlled stress: lower the nighttime temperature by a few degrees for a few weeks (if possible), maintain good lighting, and follow a regular watering cycle. Some varieties like a small dry shock followed by a mild fertilizer application to restart bud production.
Pro Tip
Placing the plant on a tray of moist clay pellets increases ambient humidity without wetting the pot. However, be careful not to leave water in direct contact with the bottom of the pot.
Practical Checklist
- Check the color and firmness of the leaves each week.
- Observe the roots: white = dry, green = moist.
- Water by soaking and drain well.
- Repot every 1–3 years depending on the substrate.
- Fertilize at half dose during growth.
FAQ
Why is my orchid losing its flowers but staying green?
Flower loss can be a natural cycle after a successful bloom. As long as the leaves remain firm and the roots active, the plant stores energy for the next flowering. Just check for absence of rot or attacks and maintain a stable lighting and watering routine.
Can you propagate an orchid to multiply plants?
Division is the simplest method: separate clumps with at least three healthy pseudobulbs each. Some orchids also multiply by keikis (buds on the flower stem), which can be detached after root formation.
How to recognize a rotten root?
Rotten roots are soft, brown, and sometimes emit an unpleasant odor. Cut them cleanly with a disinfected pruner, let the cut dry, then repot in a dry and airy substrate.
Quick Resources and Recommended Equipment
- Special orchid substrate (pine bark, sphagnum)
- Liquid orchid fertilizer
- Clean pruner, tray of clay pellets
- Horticultural LED lamp if you lack natural light