
Sommaire
Giving new life to an old buffet, revamping a family heirloom dresser, or modernizing a bedside table—these are projects that add meaning to your décor. Painting an antique piece of furniture is diving into craftsmanship, balancing authenticity and contemporary style. Between cleaning, paint selection, and careful finishing, every step counts for a durable and elegant result.
In Brief
🔹 Careful preparation: stripping, sanding, and filling ensure a smooth and uniform surface.
🔹 Suitable paints: acrylic, chalk paint, or oil-based depending on use and desired look.
🔹 Precise techniques: primer, controlled brush strokes, and possible patina effects.
🔹 Optimal protection: varnish, wax, or lacquer to enhance durability and ease maintenance.
Why Repaint an Antique Piece of Furniture?
Beyond a simple desire for something new, repainting an antique piece strengthens its story and extends its lifespan. It avoids waste, aligns with an eco-responsible approach, and creates a unique object perfectly suited to your interior. Plus, the cost often remains lower than buying new, and the pleasure of personalizing the piece is unmatched.
Preparing Your Furniture: Essential Steps
Gentle Cleaning and Stripping
First, remove dust and grease residues from the furniture. A soft sponge with a mixture of warm water and Marseille soap usually suffices. For stubborn layers of paint or varnish, opt for an eco-friendly stripper or a heat gun, taking care not to weaken the old wood.
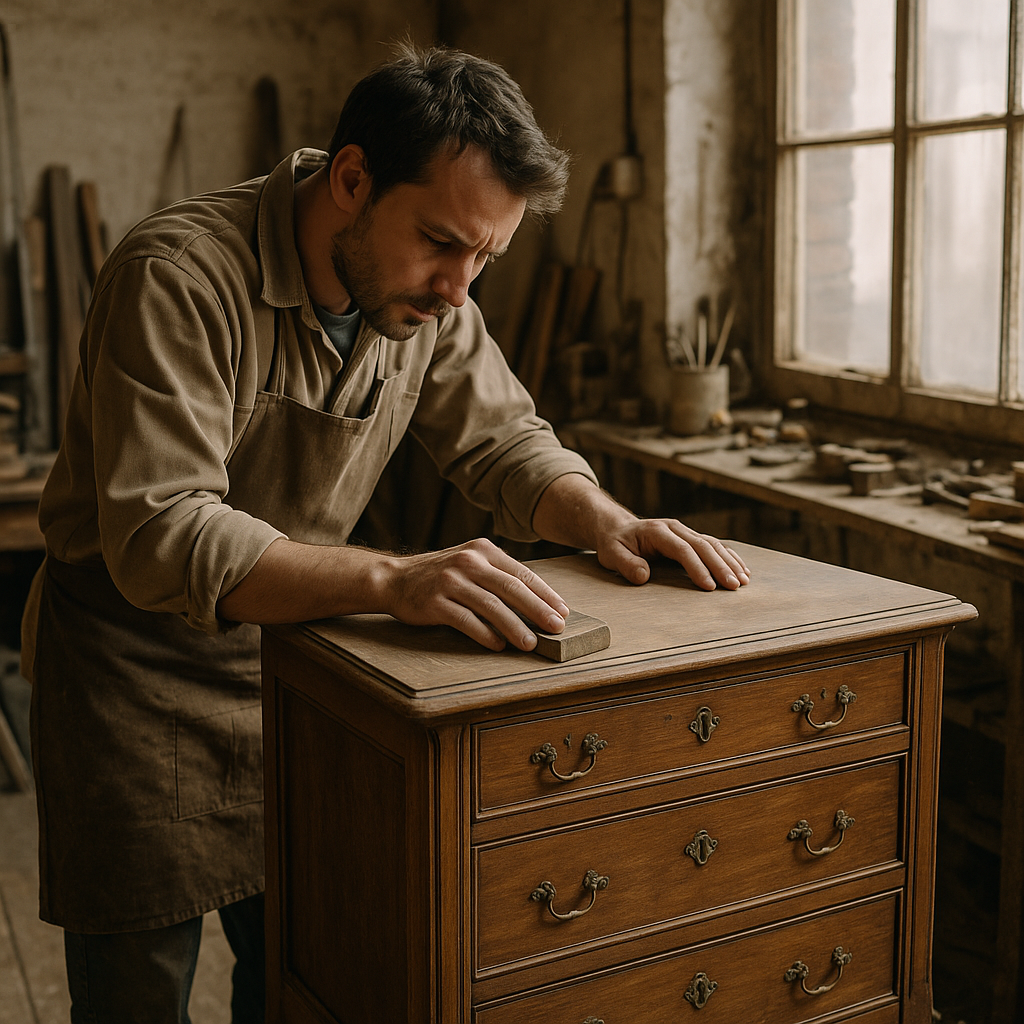
Sanding and Filling Imperfections
Once clean, the surface must be sanded evenly. Start with medium grit (80–100) to remove the old finish, then move to fine grit (120–150) to smooth. Holes or cracks are filled with wood filler: after drying, lightly sand to erase raised areas and prepare for the next coat.
Protecting Sensitive Areas
Hinges, handles, and locks are removed or masked with painter’s tape. This precaution prevents drips and ensures clean edges. Also protect the floor and immediate surroundings to work calmly and without mess.
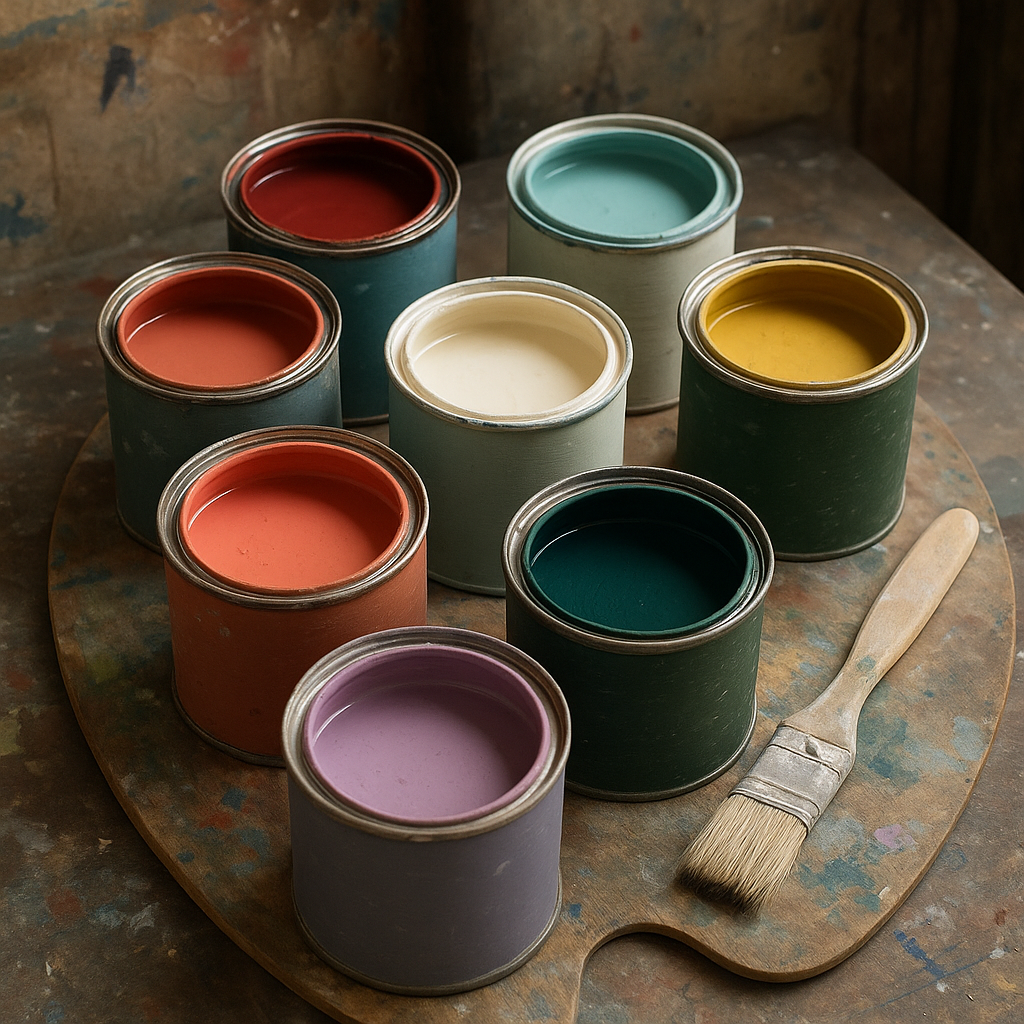
Choosing the Right Paint and Equipment
Suitable Types of Paint
| Type of Paint | Advantages | Disadvantages |
|---|---|---|
| Acrylic | Fast drying, water-cleanable | Less impact resistant |
| Chalk paint | Velvety matte effect, minimal sanding | Slightly higher cost |
| Oil-based | High durability and glossy finish | Long drying time, solvent-based |
Essential Equipment
Prefer flat brushes and short-nap rollers to avoid marks. A spray gun can replace the roller for an ultra-smooth finish, especially on large surfaces. Then, a paint tray, various sandpapers, a putty knife, and lint-free cloths complete the kit.
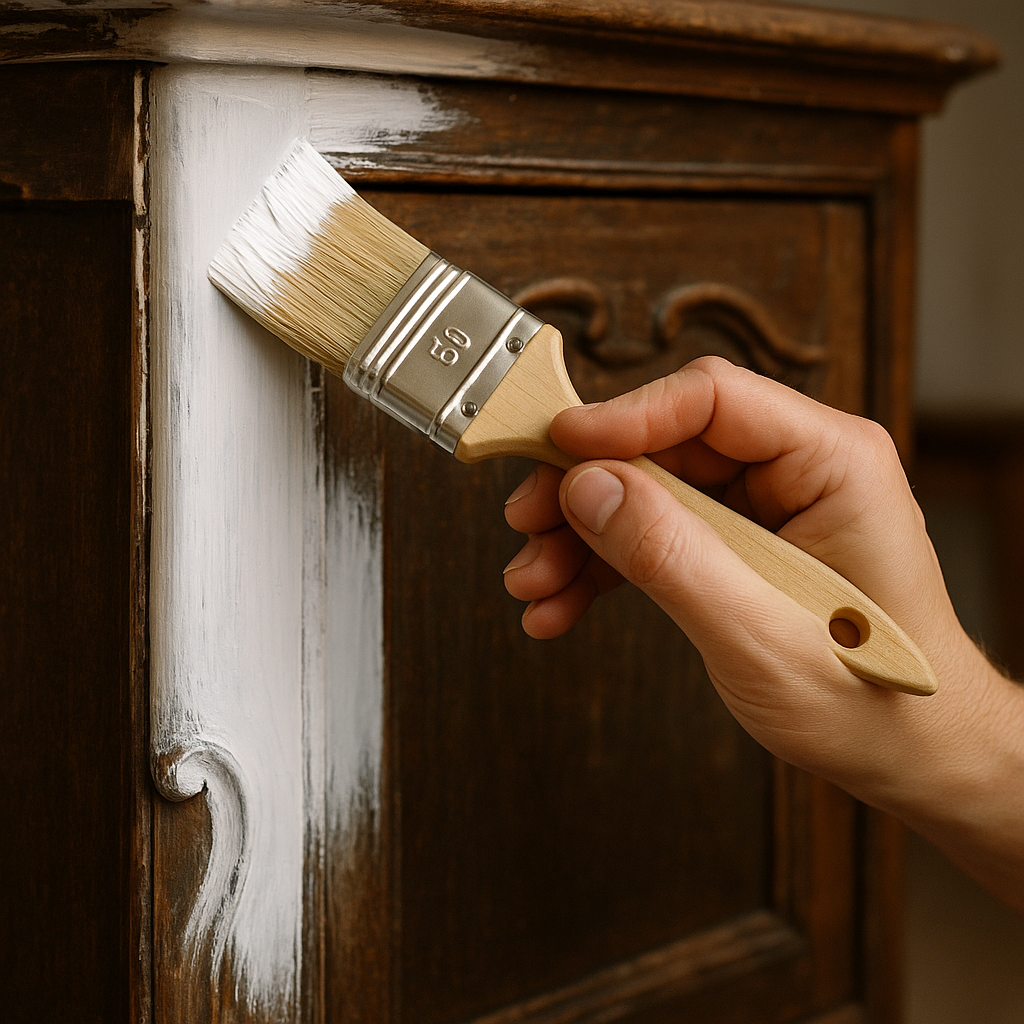
Painting Techniques for a Professional Finish
Applying an Effective Primer
The primer ensures adhesion and opacity. Spread a thin layer of primer compatible with the chosen paint. After the drying time recommended by the manufacturer (usually 2 to 4 hours), the surface appears smoother, ready to receive the final color without uneven absorption.
Paint Layer: Strokes and Rhythm
To avoid thick spots, work in several thin passes rather than one heavy coat. Brush or roller movement should be continuous, top to bottom, covering each area with perfect clarity. Between coats, light sanding (180 grit) removes small roughness that would spoil the finish.
Patina and Faux-Worn Effects
The charm of the old can be enhanced by a layer of tinted wax or a light dry brushing with a lighter shade. Rub gently with a soft brush or cloth to create worn areas on edges and corners, reproducing natural wear over time.
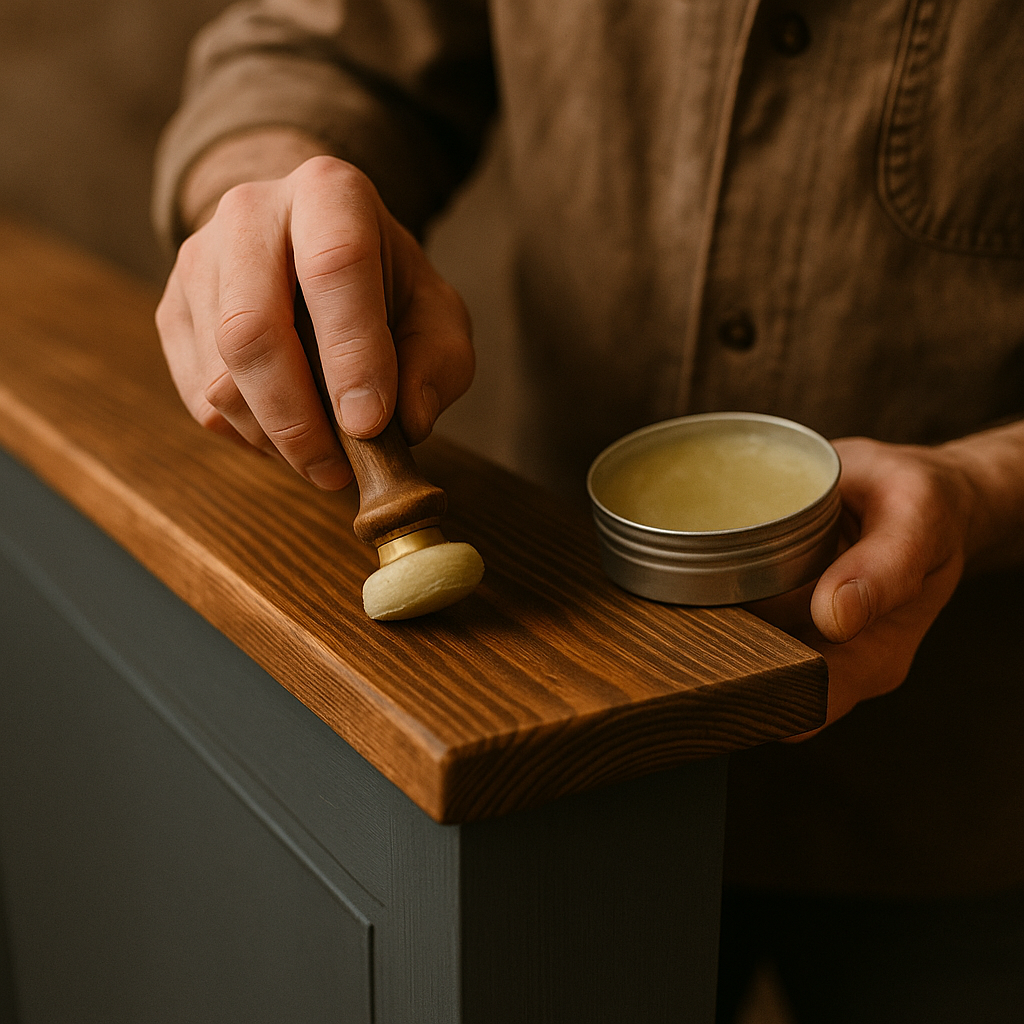
Finishes and Protections to Preserve Your Makeover
Varnish, Wax, or Lacquer: A Crucial Choice
“The right finish guarantees durability without betraying your painting work.”
Varnish strengthens resistance to scratches and liquids, ideal for everyday furniture. Wax offers a soft, satin touch but requires regular maintenance. Lacquer, more technical to apply, provides an ultra-smooth and durable finish, perfect for a buffet or dining table.
Easy Maintenance and Touch-Ups
To keep the color fresh, clean with a slightly damp soft cloth without harsh detergents. Small scratches can be concealed with a touch-up marker or clear wax, and your furniture will quickly regain its like-new look without repainting everything.
FAQ
- Which paint to choose for furniture exposed to humidity? Prefer a high-resistance acrylic paint or a waterproof varnish as a finish.
- Can the sanding step be skipped? Light sanding is essential to ensure paint adhesion and avoid bubbles.
- How to achieve a shaker or country style effect? Combine chalk paint and tinted wax for a soft, matte finish typical of cottage style.
- How much time to plan for a complete piece? On average 2 to 3 days, including drying and touch-ups.
- Can paint be applied outdoors? Yes, with specially formulated exterior paint and UV protective varnish.