
Sommaire
A leaking toilet is often a sneaky drip that drives up the bill and prematurely wears out your equipment. This guide explains how to detect the source of a leak, which component to replace depending on the symptom, and what checks to perform after the repair. We avoid unnecessary jargon: you will get concrete solutions, safe small actions, and clear benchmarks to decide whether the operation remains a DIY task or requires a professional.
In brief
🔧 Diagnose first: a leak can come from the **flapper**, the **float**, the **gasket**, or a crack. Identifying whether the water runs continuously or if the bowl fills slowly completely changes the repair.
🕒 Duration: most replacements (flapper, float, gasket) take between **15 and 45 minutes** for a equipped DIYer. Allow more time for an old or hard-to-reach tank.
💡 Indicative cost: parts alone between **5 € and 30 €**, complete mechanism between **20 € and 80 €** depending on the brand. Doing it yourself saves labor costs but requires method and thorough checks after the intervention.
How to diagnose a toilet leak
Start by differentiating two situations: water flowing **continuously** (sometimes you hear a whistle or see the water surface vibrate) and more subtle water loss (the bowl fills gradually without flushing). The simple method: pour a few drops of food coloring into the tank, wait 10–15 minutes without flushing, and observe the bowl. If it takes on the color, the leak is from the tank to the bowl — often the flapper or its gasket.
Most common signs and causes
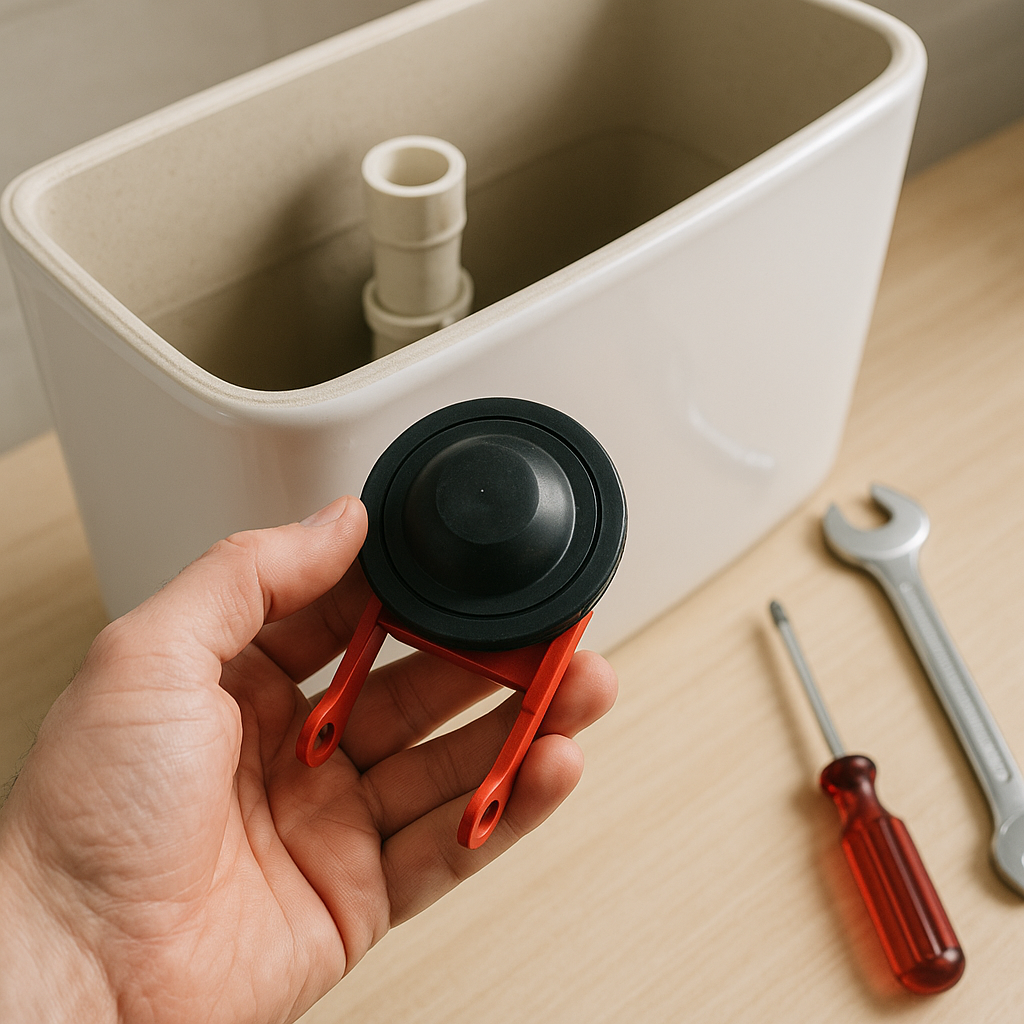
- Worn flapper: lack of seal when the flapper rests on the seat. Common and quick fix.
- Misadjusted float: the level stays too high and water passes through the overflow, or too low and the flush is weak.
- Degraded gasket: leak between tank and bowl, visible under the tank or as moisture traces on the floor.
- Crack in the tank: rare but critical; sometimes temporarily repaired, often replacement necessary.
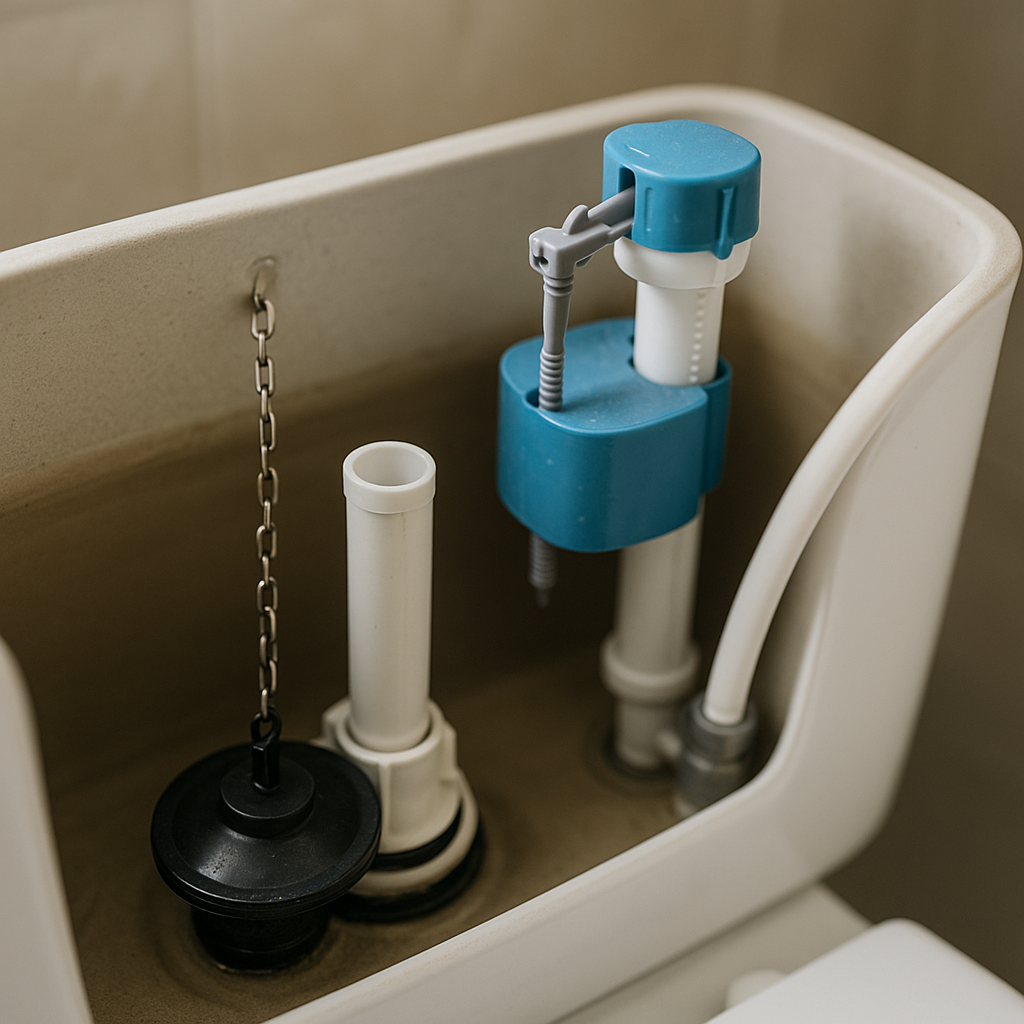
Preparing the intervention: tools and precautions
Before opening the tank, turn off the water supply usually located below. Empty the tank by flushing, then soak up the residual water. Prepare: an open-end wrench or an adjustable wrench, a screwdriver, a small bucket, cloths, and a soft brush. If you are replacing a gasket, have a suitable synthetic material replacement gasket (neoprene or EPDM rubber). If the bowl or tank is old, place a towel to protect the porcelain from the tools.
Recommended tools list
- Adjustable wrench 10–15 mm
- Phillips and flat screwdriver
- Plastic spatula or scraper
- Flange gasket, universal valve, or complete mechanism
- Cloths, bucket, electrician’s tape (for temporary fixes)
Repair according to the identified problem
Each symptom has a specific action. Here are the most frequent interventions, explained step by step.
1) The valve leaks: replacing the valve or the gasket
Symptom: water continuously flows into the bowl, dye detected. Procedure: shut off the water, empty the tank, unclip or unscrew the existing mechanism and remove the old valve. Clean the seat (lime deposits) with a soft brush. Install the new valve or replace only the gasket if the body is in good condition. Check the seating: the gasket must rest perfectly, without twisting.
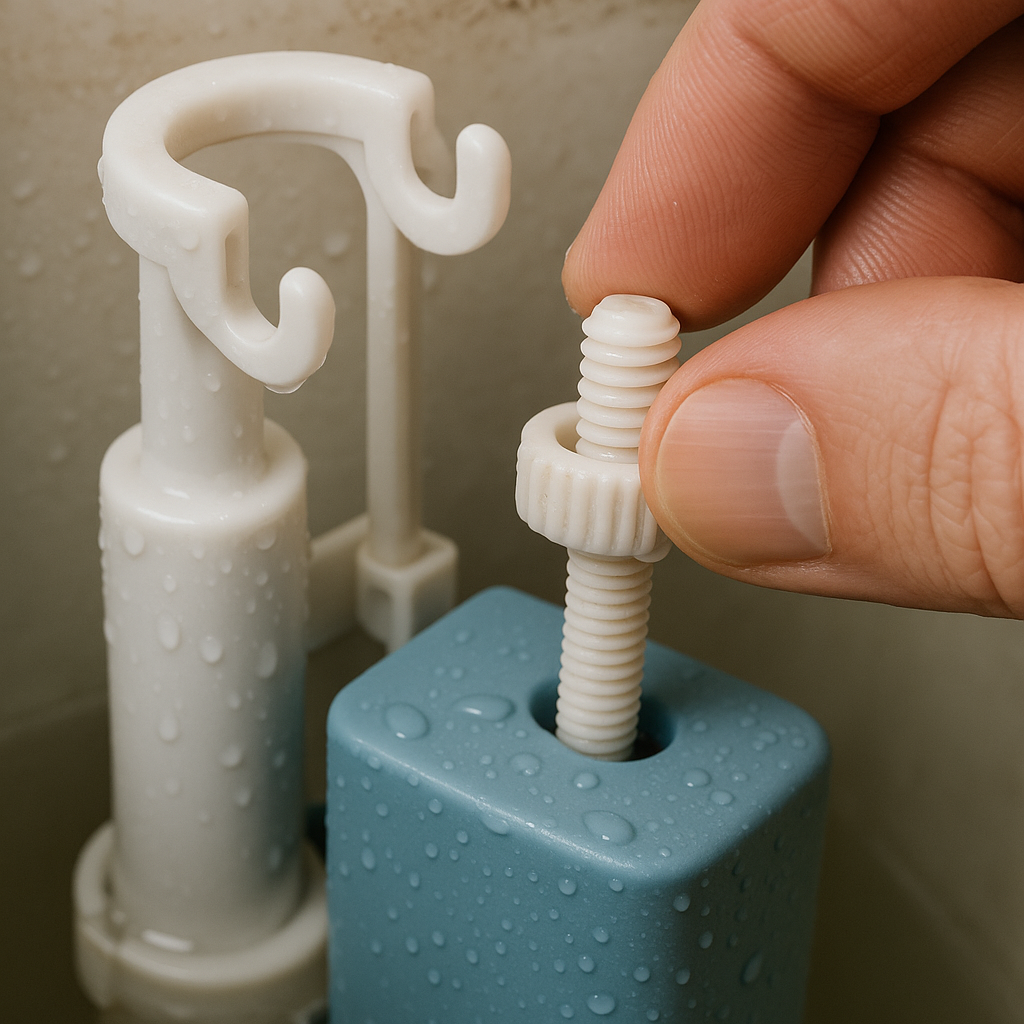
2) The level is too high or too low: adjusting the float
Symptom: water reaches the overflow height or weak flush. Modern floats are often adjustable by a screw or a clip; others use a bent rod. Lower or raise the float to adjust the water level to the setting indicated on the tank (usually 1–2 cm below the overflow edge). If the float is pierced or stuck, replace it — it is inexpensive and quick.
3) Leak between tank and bowl: flange gasket
Symptom: traces of moisture or leak on the floor after each refill. Procedure: shut off the water, remove the tank (unscrew the fixing nuts under the bowl), replace the flange gasket with a new and stable model. When reassembling, tighten the nuts diagonally, progressively, to avoid breaking the porcelain.
| Cause | Symptom | Recommended action |
|---|---|---|
| Worn valve | Continuous backflow into the bowl | Replace valve / clean the seat |
| Improperly adjusted float | Level too high / too low | Adjust or replace the float |
| Flange gasket | Leak under the tank | Replace gasket, tighten diagonally |
| Crack | Visible and constant leak | Tank replacement recommended |
Replacing the complete mechanism: when and how
Sometimes, the float/valve assembly is so old or corroded that repairing piece by piece becomes counterproductive. Replacing the complete mechanism is often the most durable solution: a new ready-to-use set is installed, universal for most toilets. Warning: check the type of fixing (through screws or tabs) and the water inlet height to choose a compatible kit.
- Remove the old mechanism by unscrewing the lower nuts.
- Install the new mechanism following the instructions: new gasket, firm but moderate tightening.
- Make one or two level adjustments and a dye test.
Tests and Checks After Repair
Don’t leave immediately: let two full filling cycles run, observe the level, listen for any whistling. Repeat the dye test to confirm the seal. Also check for the absence of external drips at the connections. Improper tightening can crack the porcelain — it’s better to loosen and reposition than to force.
Quick Checklist After Intervention
- Dye test: no dye appears in the bowl after 15 minutes.
- Level stable and compliant with the guideline.
- No leakage under the tank.
- Smooth operation of the lever or button.
Costs, Duration, and When to Call a Professional
For an average DIYer, replace a valve or a seal in 20–40 minutes, a complete mechanism in 30–60 minutes. Part prices: valve 5–20 €, seal 5–15 €, complete mechanism 20–80 €. Call a plumber if the porcelain is cracked, if the fastenings are corroded to the point of requiring drilling, or if you doubt the seal after several attempts: a poorly repaired leak can cause costly water damage.
Practical tip: always keep a small kit with a universal valve and a flange seal under the sink. It ensures a quick repair and a reasonable bill.
FAQ
What to do if the leak persists after changing the valve?
Recheck the valve seat and clean it: lime deposits prevent sealing. If the problem persists, replace the complete mechanism or have the seat checked by a professional (machining possible on some models).
Can a crack in the tank be repaired?
An epoxy repair offers a temporary solution for a minor crack, but it is not reliable in the long term. For safety and durability, replacing the tank is preferable.
Will a universal valve always fit?
Universal valves work on most modern tanks, but some older models or designer bowls require a specific reference. Compare dimensions and fittings before purchase.
How to reduce water consumption after repair?
Adjust the float to reduce the volume of water per flush, or install a dual-flush mechanism (1 button = 2 volumes). However, avoid setting it too low, which causes ineffective rinsing.
Practical Conclusion
Repairing a toilet flush leak is often an accessible task: precise diagnosis, replacing the defective component, and careful testing save water and money. In case of uncertainty or fragile porcelain, do not hesitate to call a professional to avoid worsening the problem.
{
“@context”: “https://schema.org”,
“@type”: “FAQPage”,
“mainEntity”: [
{
“@type”: “Question”,
“name”: “What to do if the leak persists after changing the flapper?”,
“acceptedAnswer”: {
“@type”: “Answer”,
“text”: “Check the seating of the flapper again and clean the seat: lime deposits prevent sealing. If the problem persists, replace the entire mechanism or have the seat checked by a professional.”
}
},
{
“@type”: “Question”,
“name”: “Can a crack in the tank be repaired?”,
“acceptedAnswer”: {
“@type”: “Answer”,
“text”: “An epoxy repair offers a temporary solution for a minor crack, but it is not reliable in the long term. For safety and durability, replacing the tank is preferable.”
}
},
{
“@type”: “Question”,
“name”: “Will a universal flapper always fit?”,
“acceptedAnswer”: {
“@type”: “Answer”,
“text”: “Universal flappers work on most modern tanks, but some older models or designer bowls require a specific reference. Compare dimensions and fittings before purchase.”
}
}
]
}
{
“@context”: “https://schema.org”,
“@type”: “WebPage”,
“about”: {
“@type”: “Thing”,
“name”: “Repairing a toilet flush leak”
},
“keywords”: [“toilet flush”, “leak”, “flapper”, “gasket”, “float”]
}